Web components
Create a web component
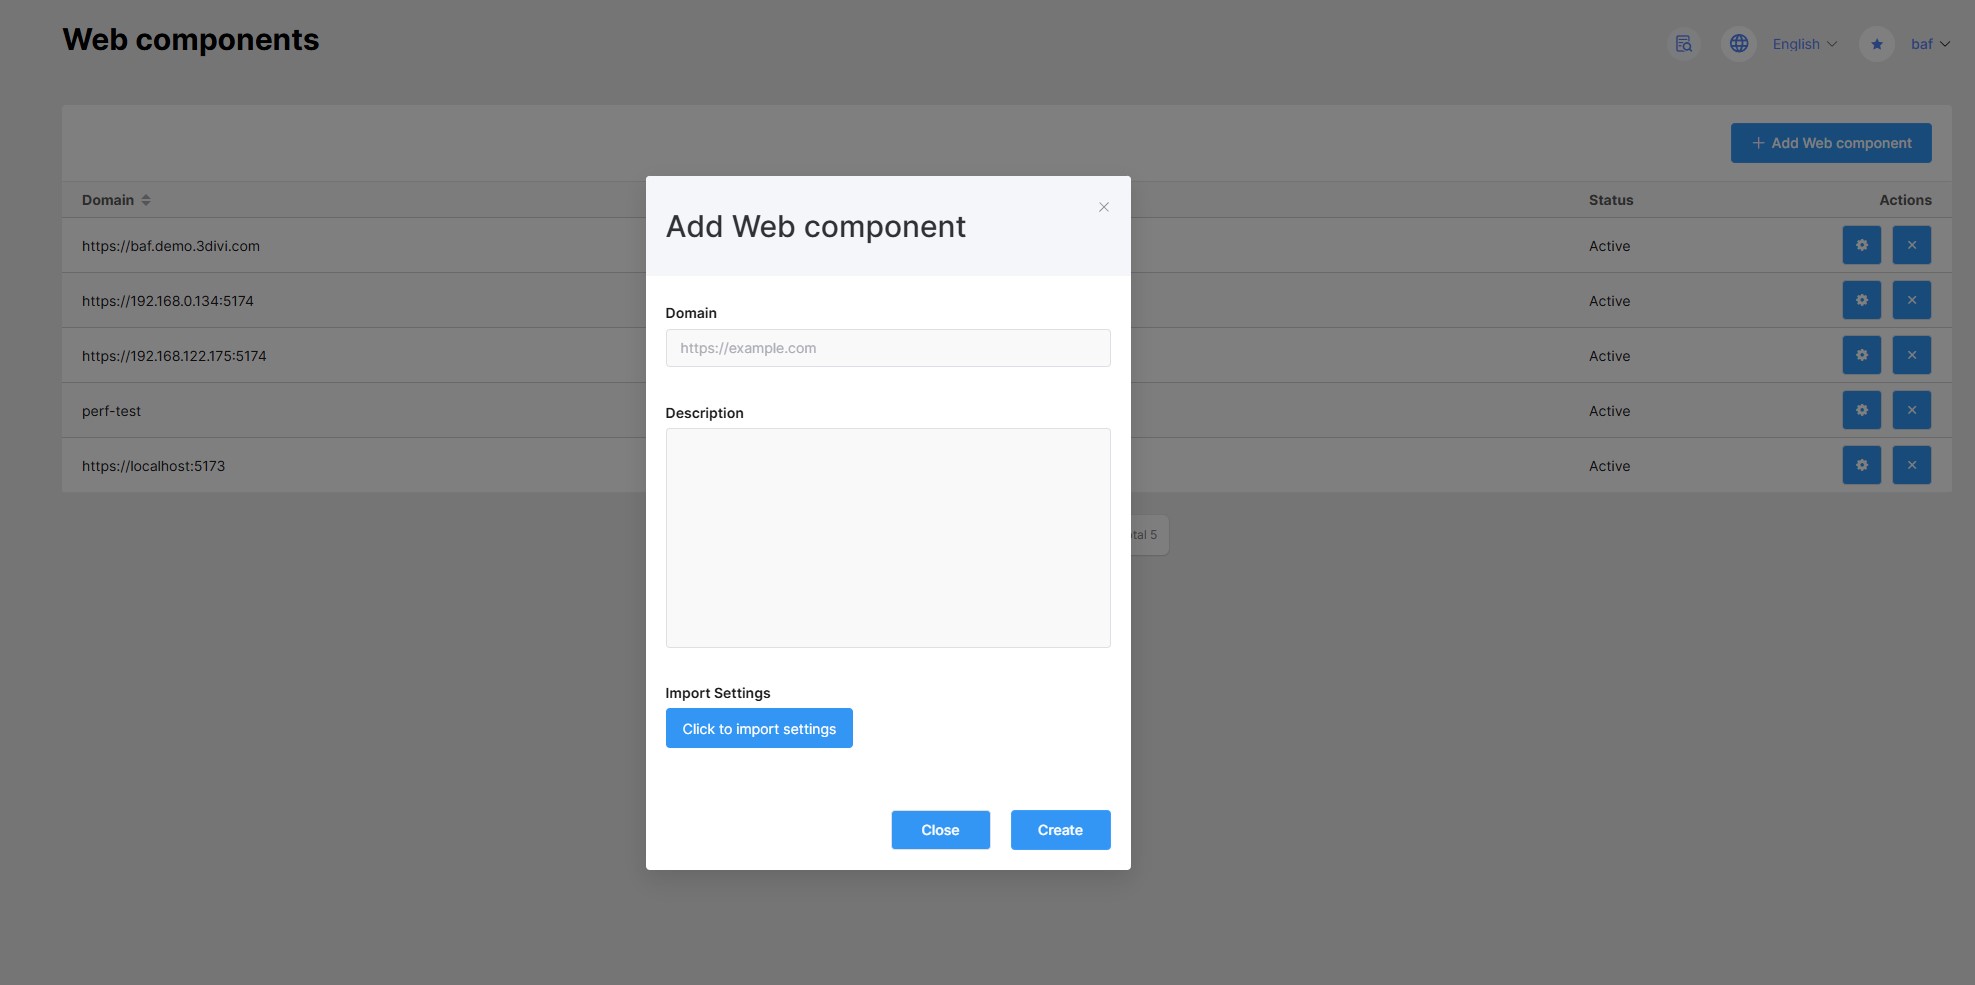
- Click the Add Web component button at the top right of the page.
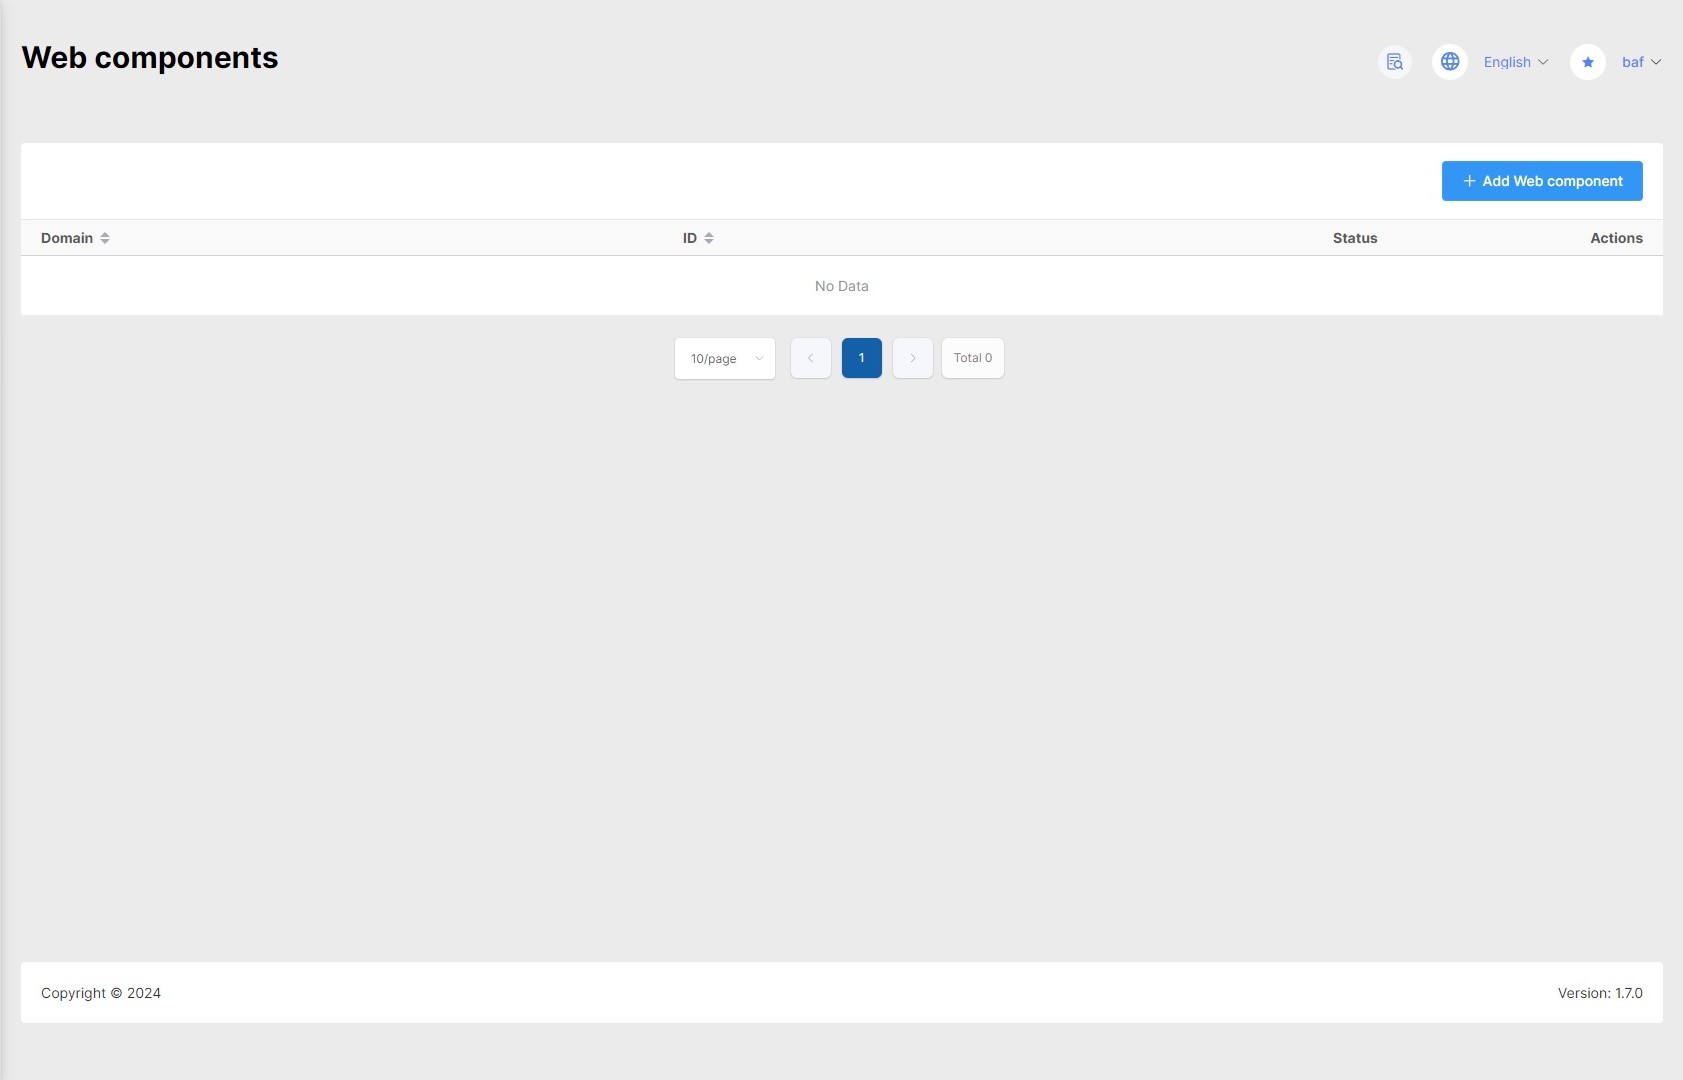
- Enter the domain on which the Web component will be used, and, if necessary, a description. After adding the Web component, it will appear in the list. You can also import settings that were previously exported.
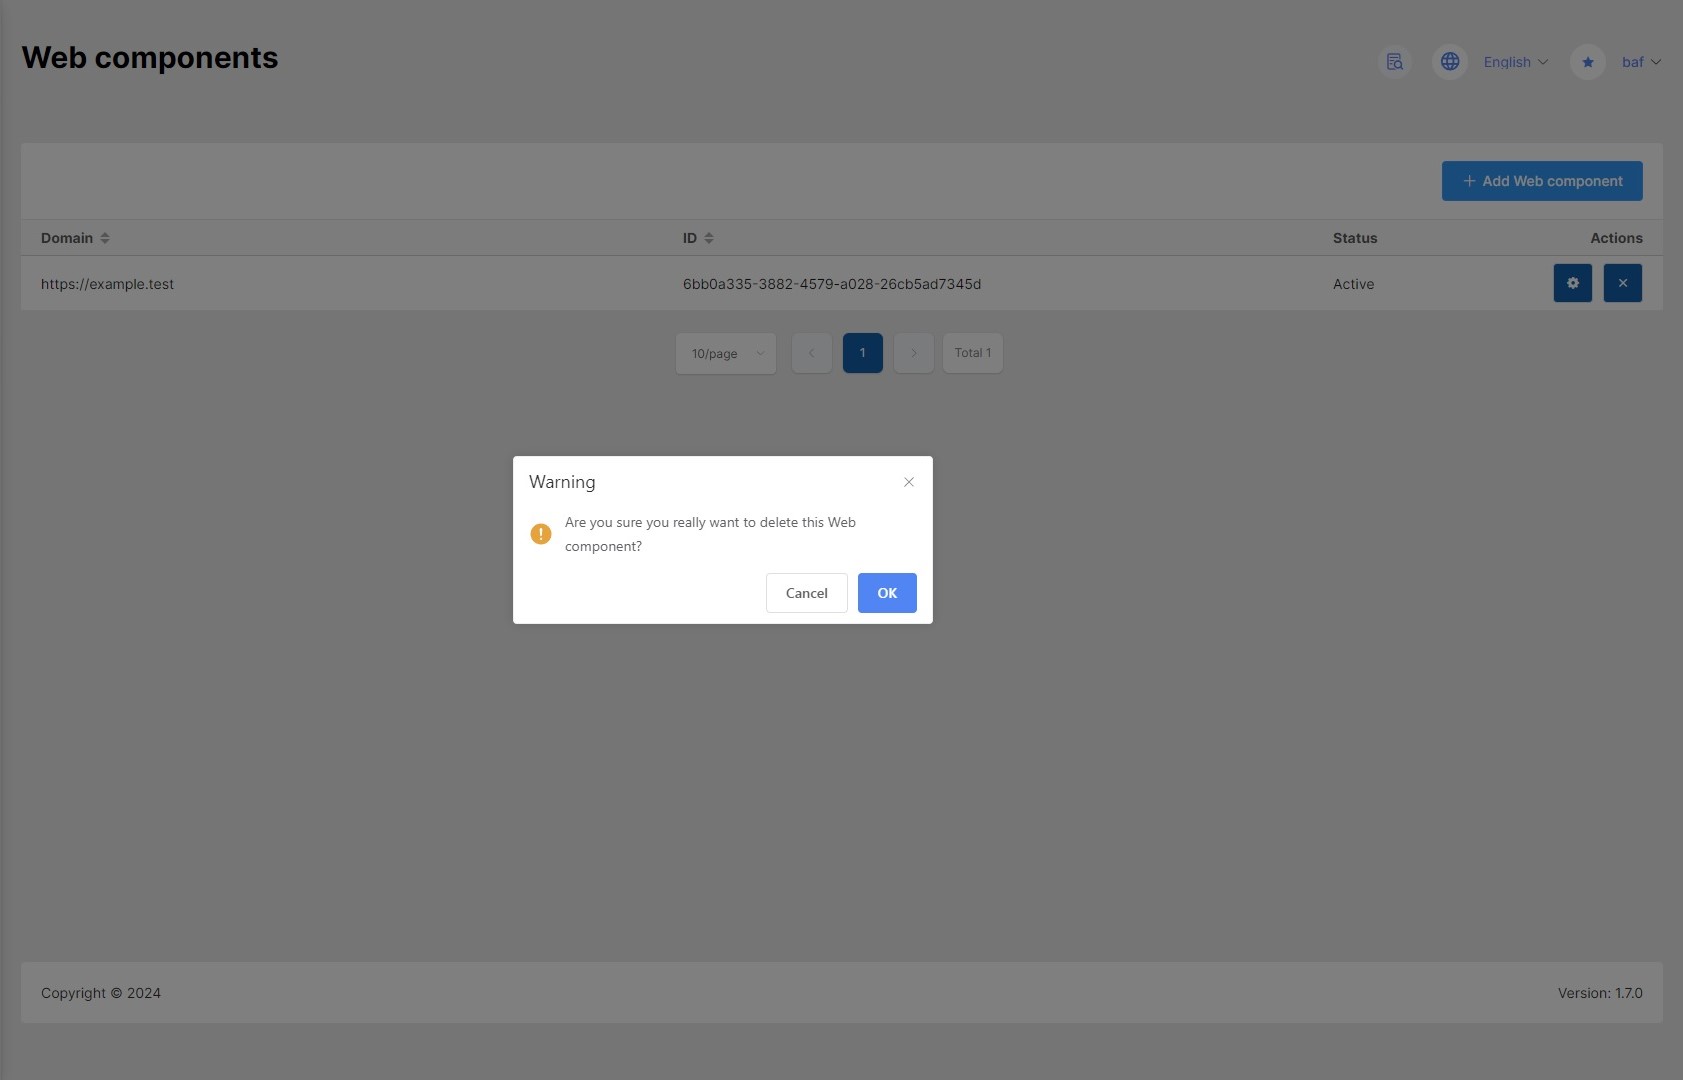
Delete a web component
To delete a Web component, click on the cross icon in the line. The Web component will be deleted after confirmation.
Web component settings
You can export the web component settings from the system to transfer them to another instance or to create a backup.

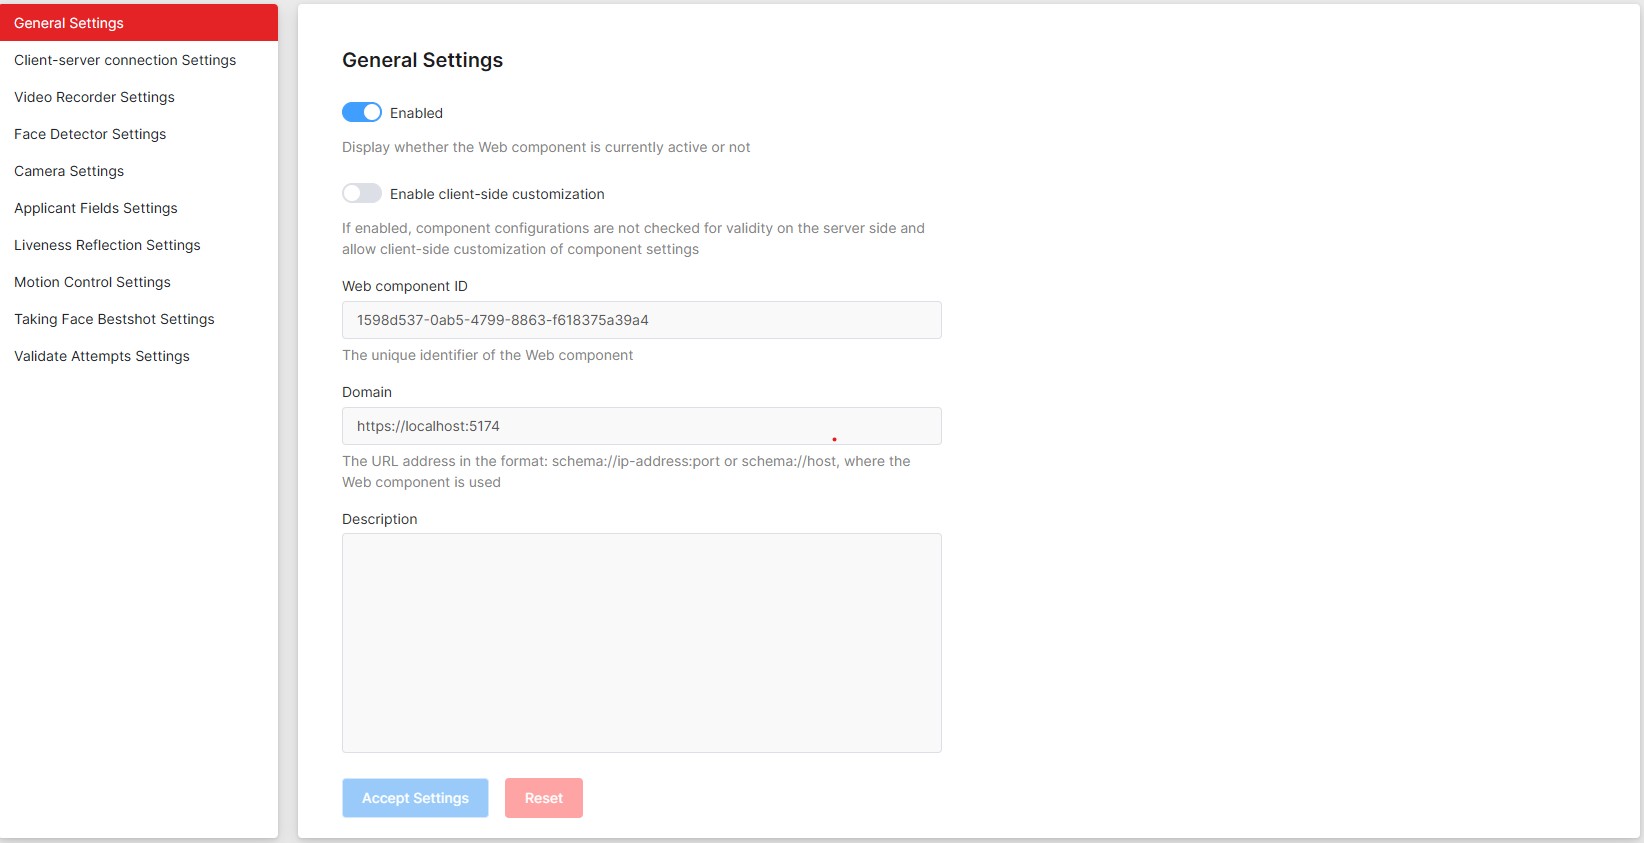
General settings
The following parameters of the Web component are configured:
- Enable or disable the Web component
- Enable or disable validation of data from a component on the server side. Enabling this setting disables server-side validation, allowing you to override component settings on the browser side. For example, deciding whether or not Motion Control video will be recorded based on browser data.
- The domain where the Web component is used
- Description of the Web component
The Web component ID field cannot be changed and is used to connect the Web component to the server.
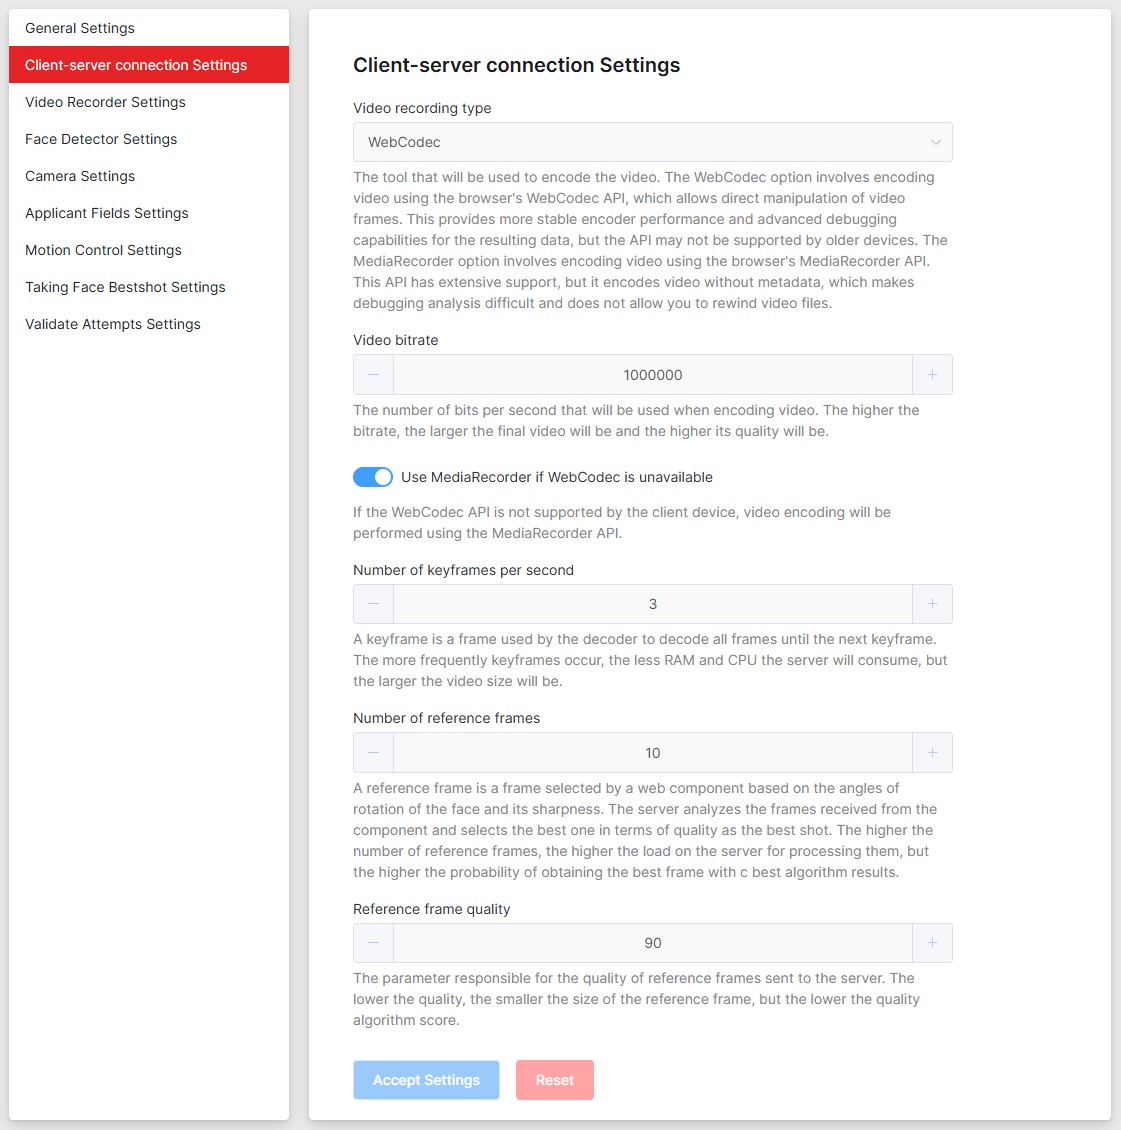
Connection settings
The following parameters are available for the WebSocket type:
- Video recording method. The tool used to encode the video. Two options are available: MediaRecorder (recommended), WebCodec.
- Video bitrate
- Number of key frames per second in the video
- Number of reference frames
- Quality of reference frames
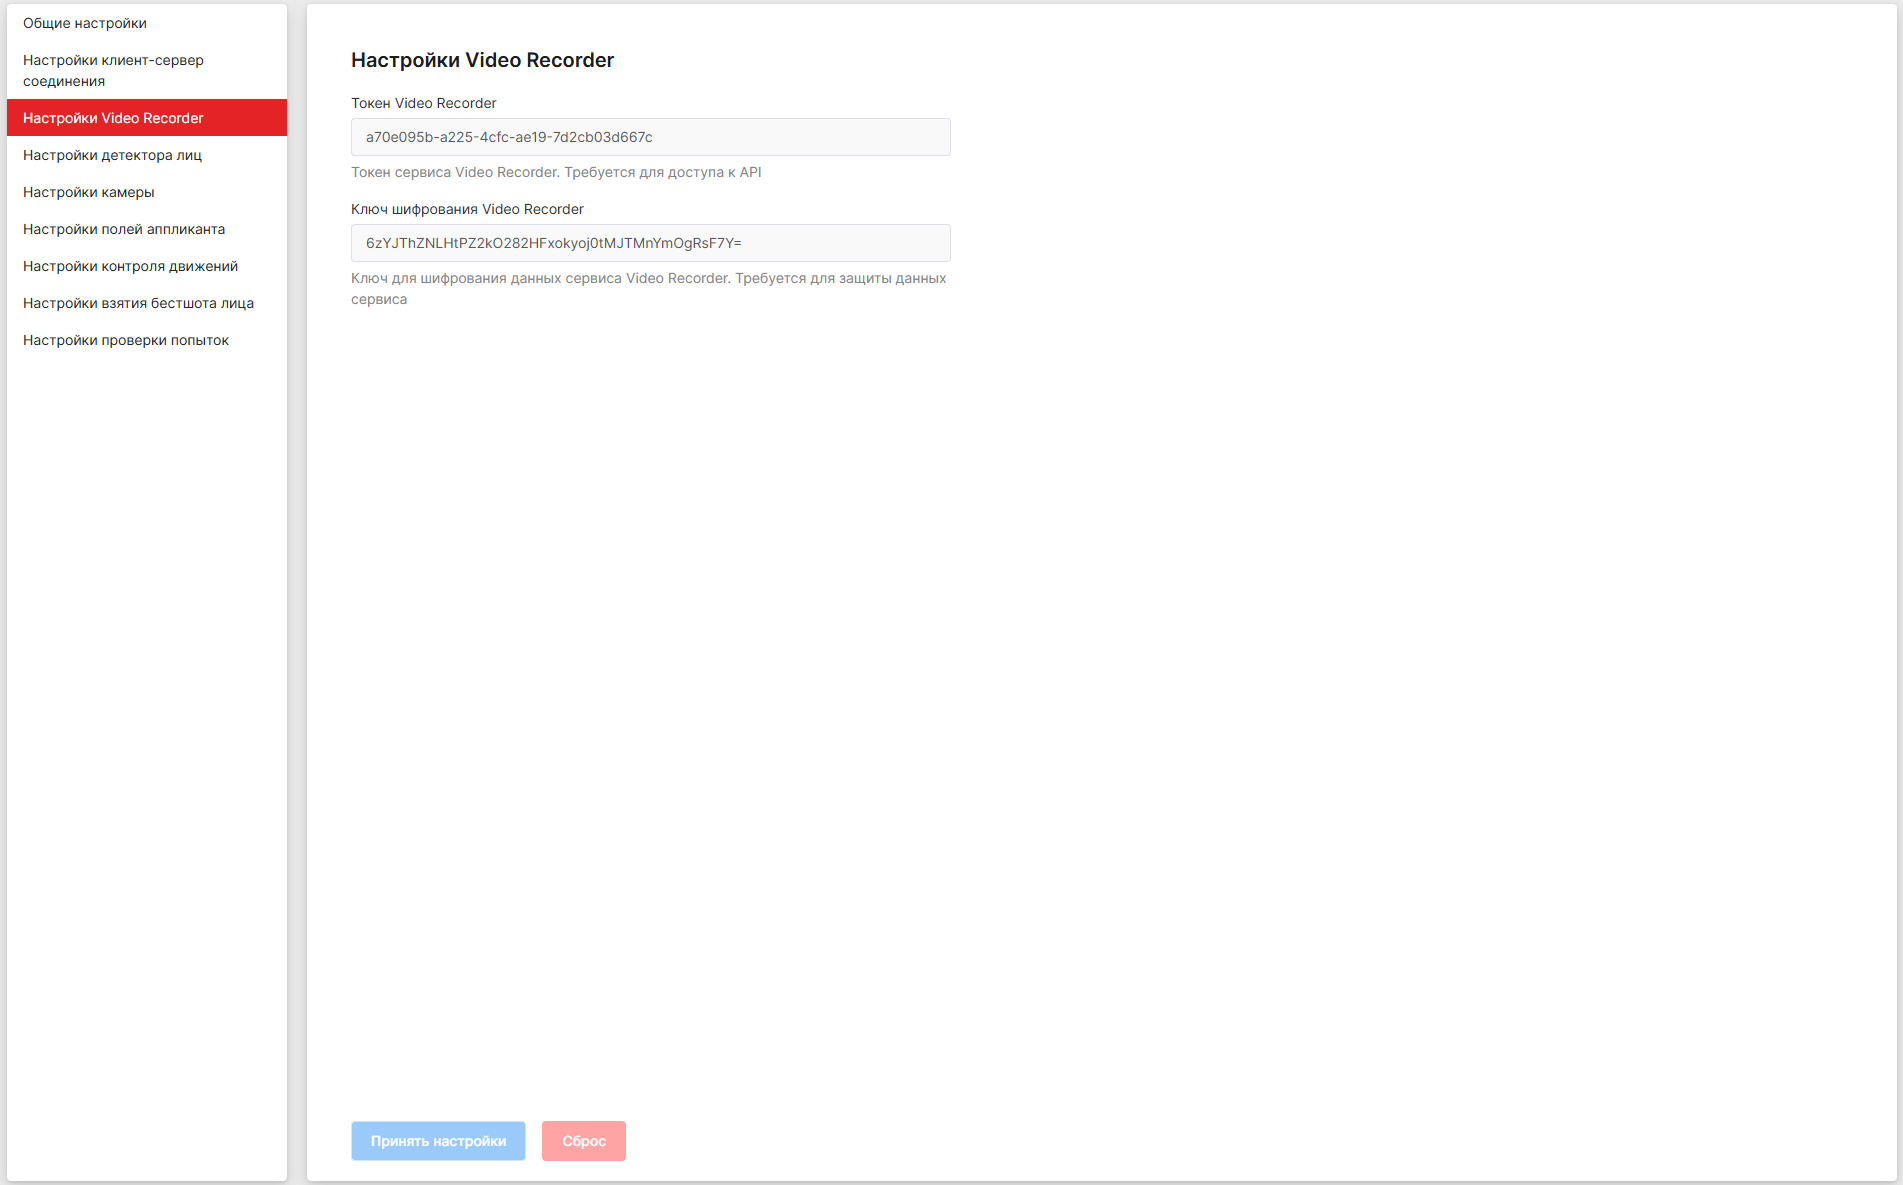
Video recorder settings
The access token to the video-recorder service and its encryption key are displayed here.
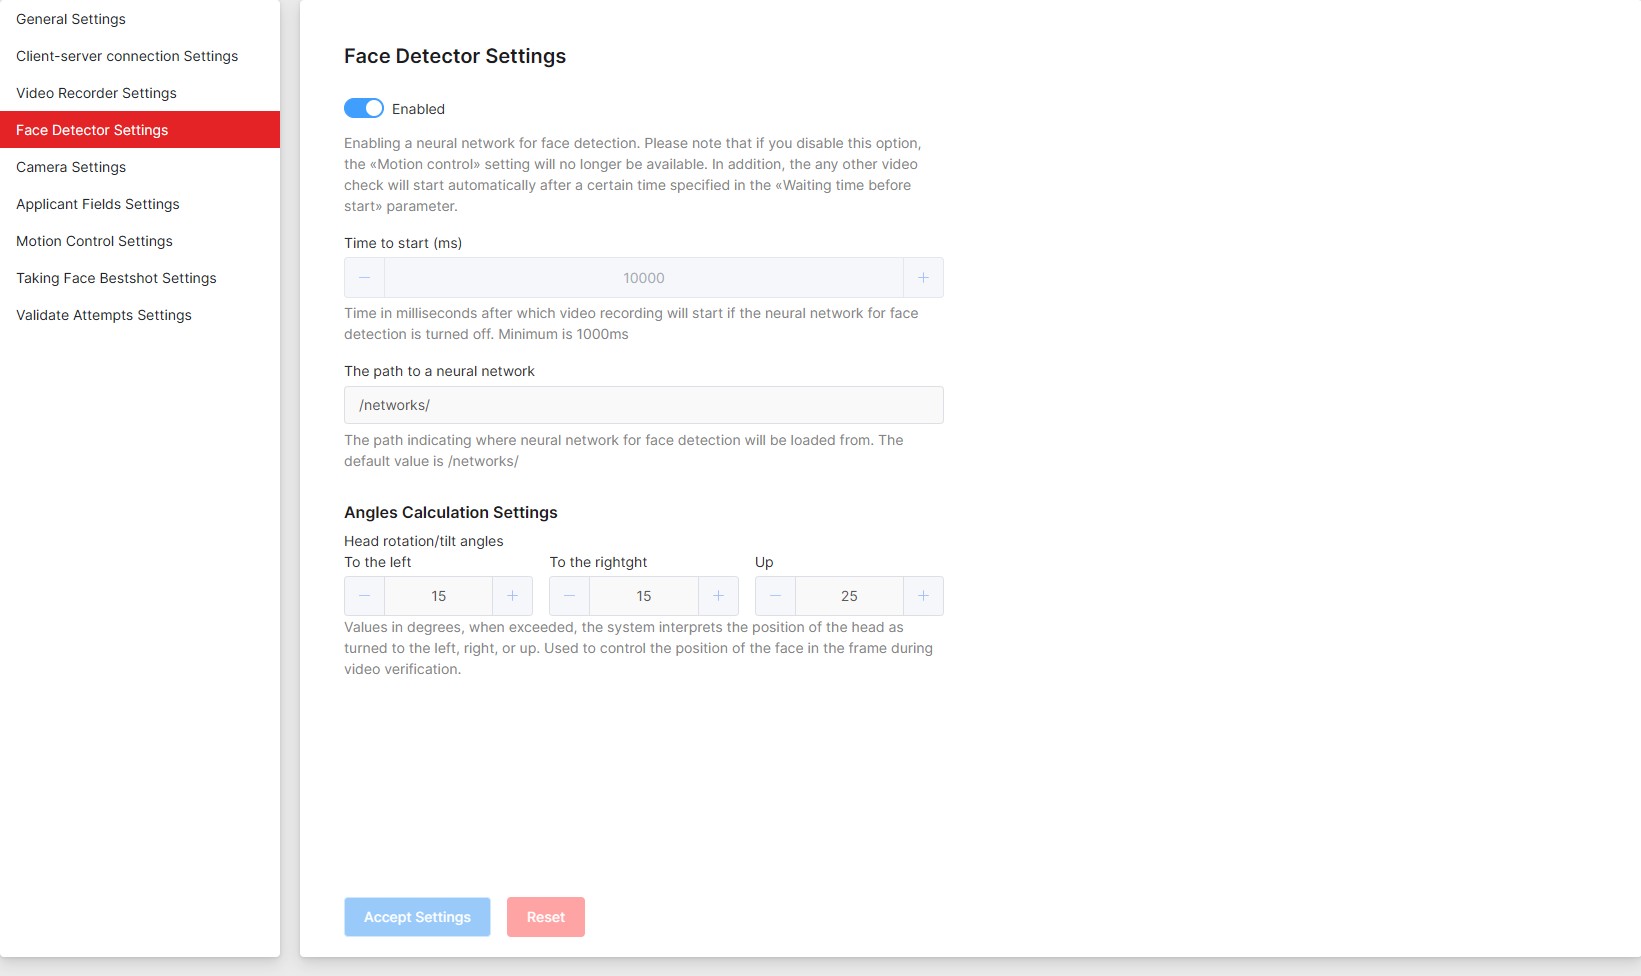
Face model settings
The following parameters of the Web component are configured:
- Enable or disable a neural network for face detection
- Time in milliseconds after which video check recording will start if the neural network is disabled. This setting is active if a neural network for face detection is disabled.
- Path specifying where the neural models will be loaded from. The default value is /networks/
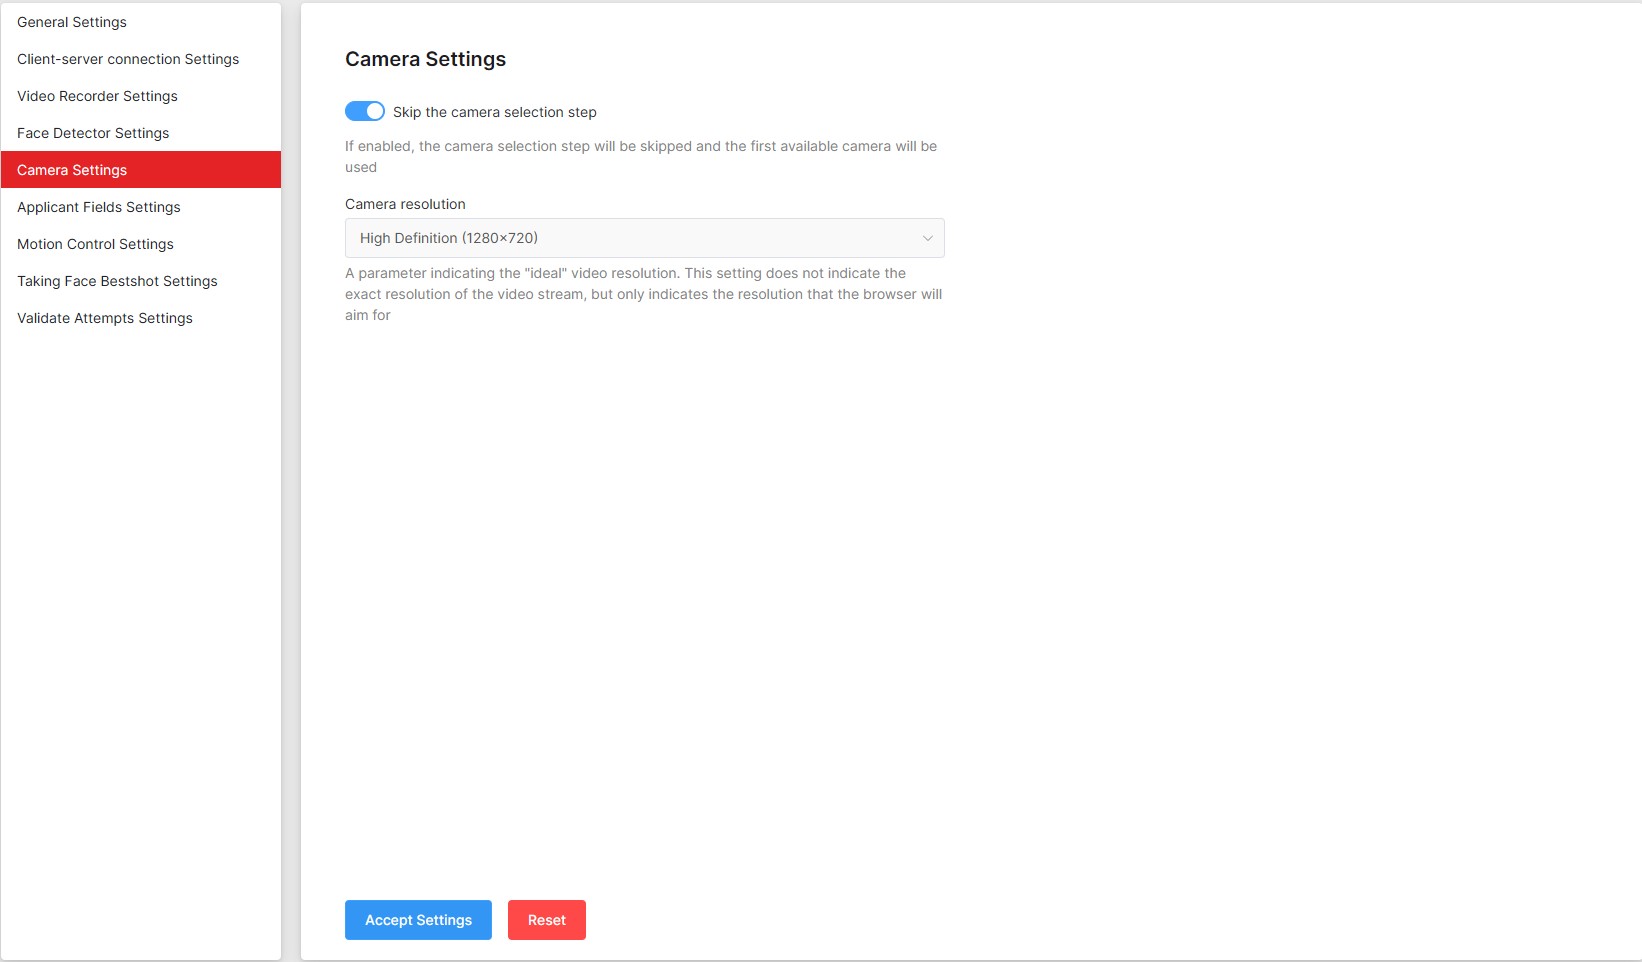
Camera settings
The following parameters of the Web component are configured:
- Skip the camera selection step. If enabled, the camera selection step will be skipped and the first available camera will be used.
- Selecting the preferred camera resolution. This option does not specify the exact resolution of the video stream, but only specifies the resolution that the browser will target.
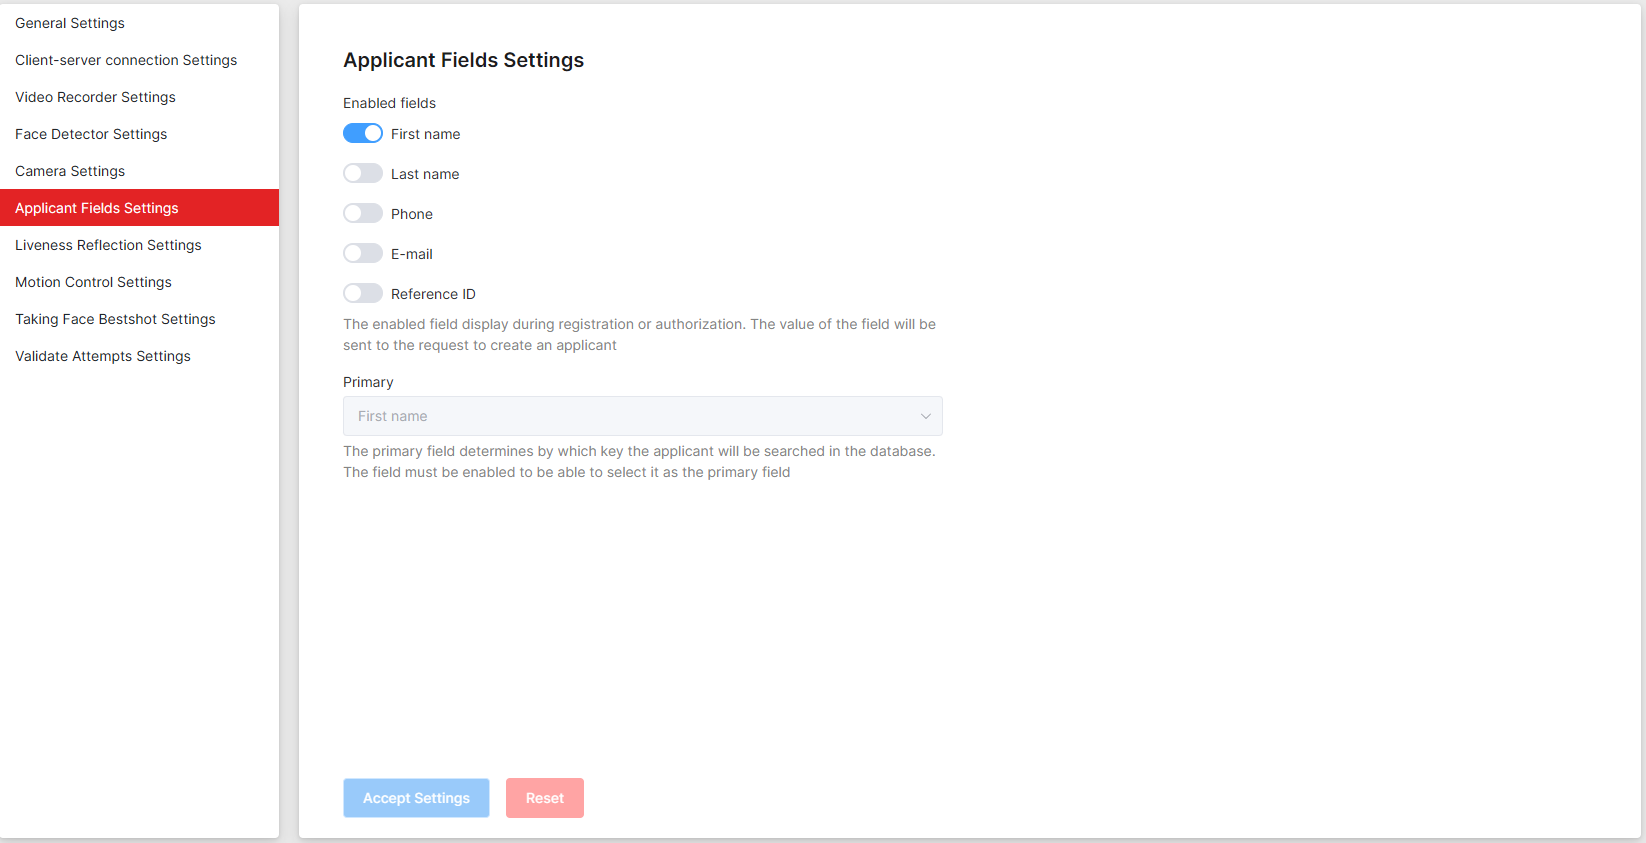
Applicant fields settings
Here you can configure the fields that should be displayed during registration or authorization. The values of these fields will be sent to the request to create an applicant. The primary field determines by which key the applicant will be searched in the database.
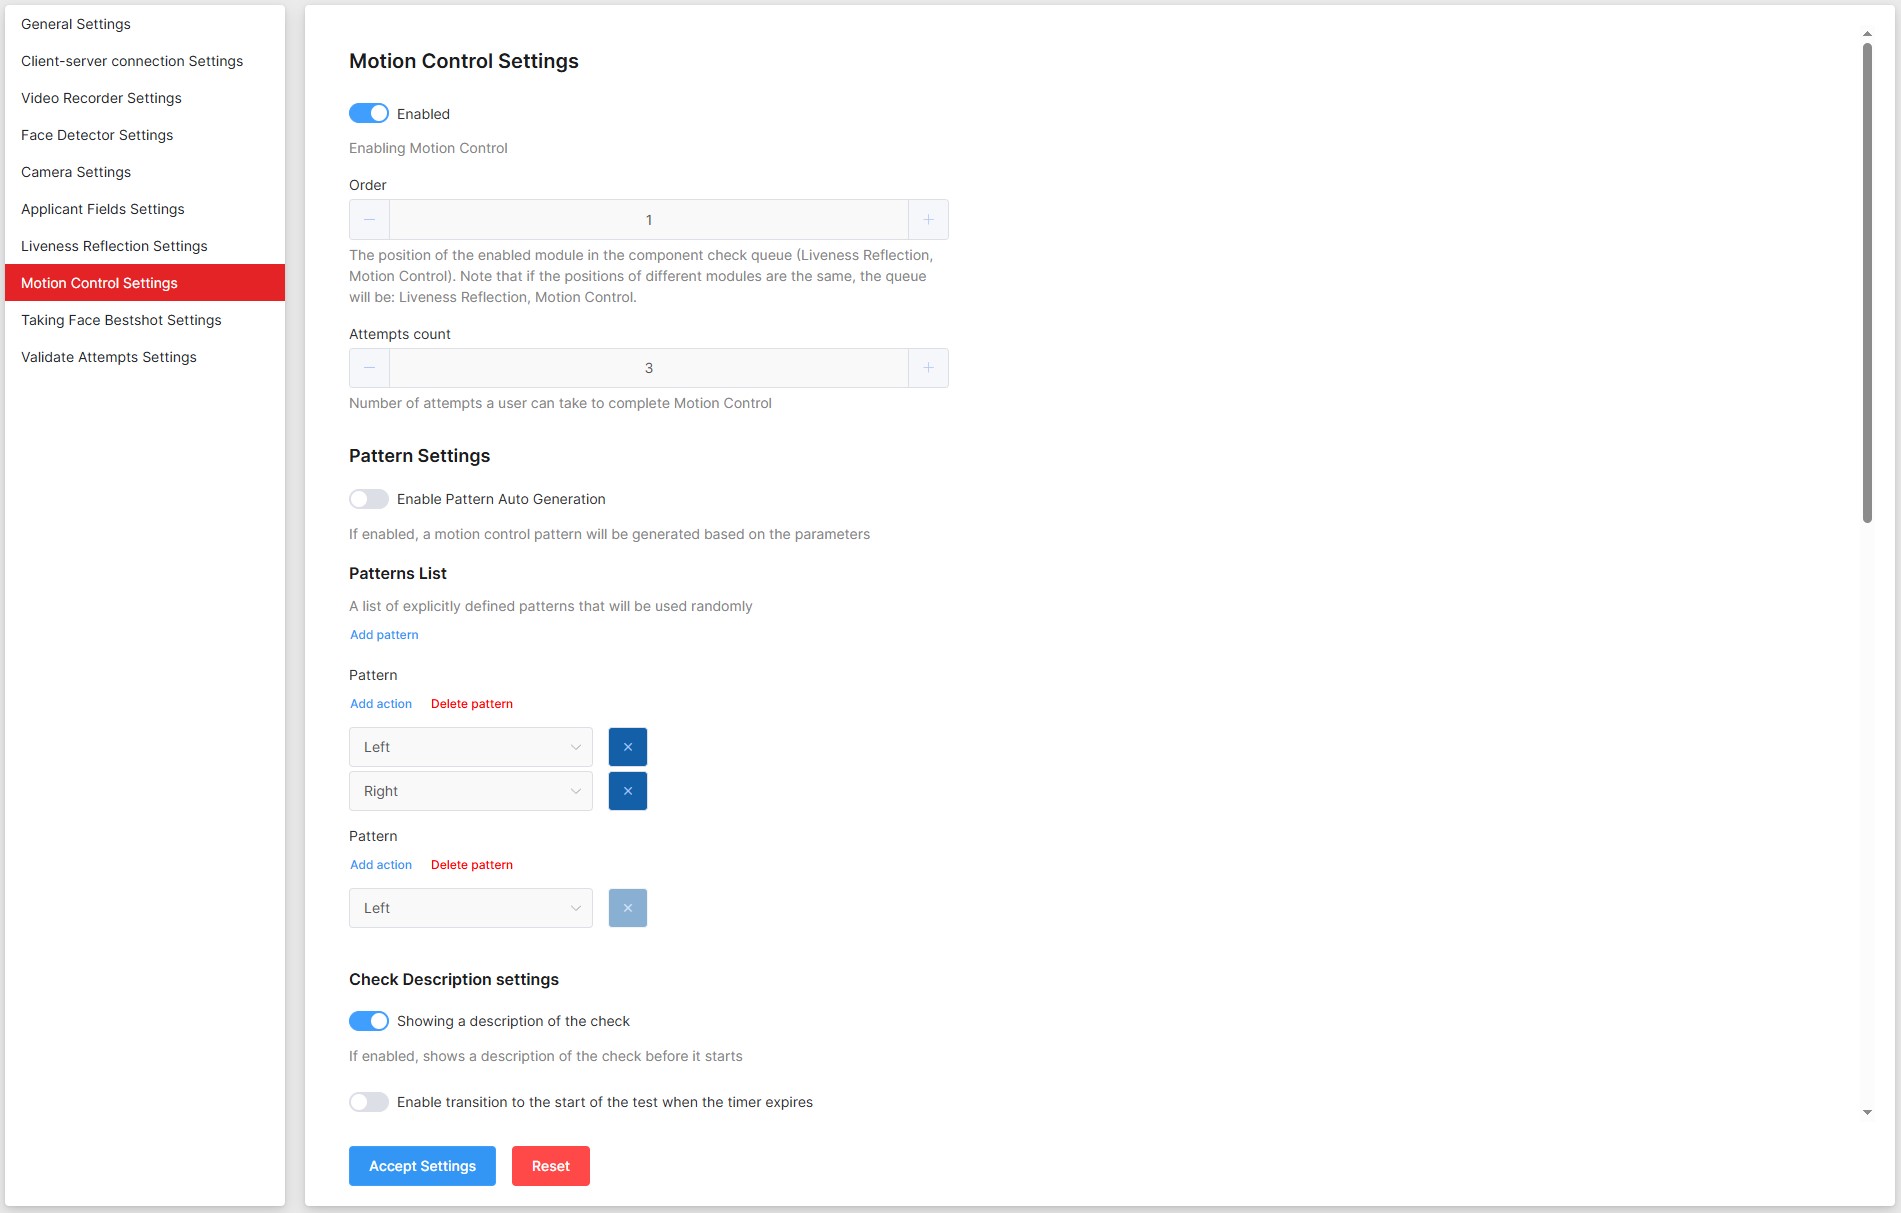
Motion control settings
The following parameters of the Web component are configured:
- Enable or disable motion control. If face detection is disabled, motion control will also be disabled.
- The position of the enabled video check module in the inspection queue. Note that if the positions of different modules are the same, the inspection will be performed in the following order: first Liveness Reflection, then Motion Control.
- The number of attempts the user can take to complete Motion Control.
- Settings for displaying the check description.
- Face frame settings.
- GIF prompts for Motion Control commands to be displayed during Motion Control testing.
- Configuring patterns for motion control. Selection of mode: autogeneration by preset parameters or static pattern set.
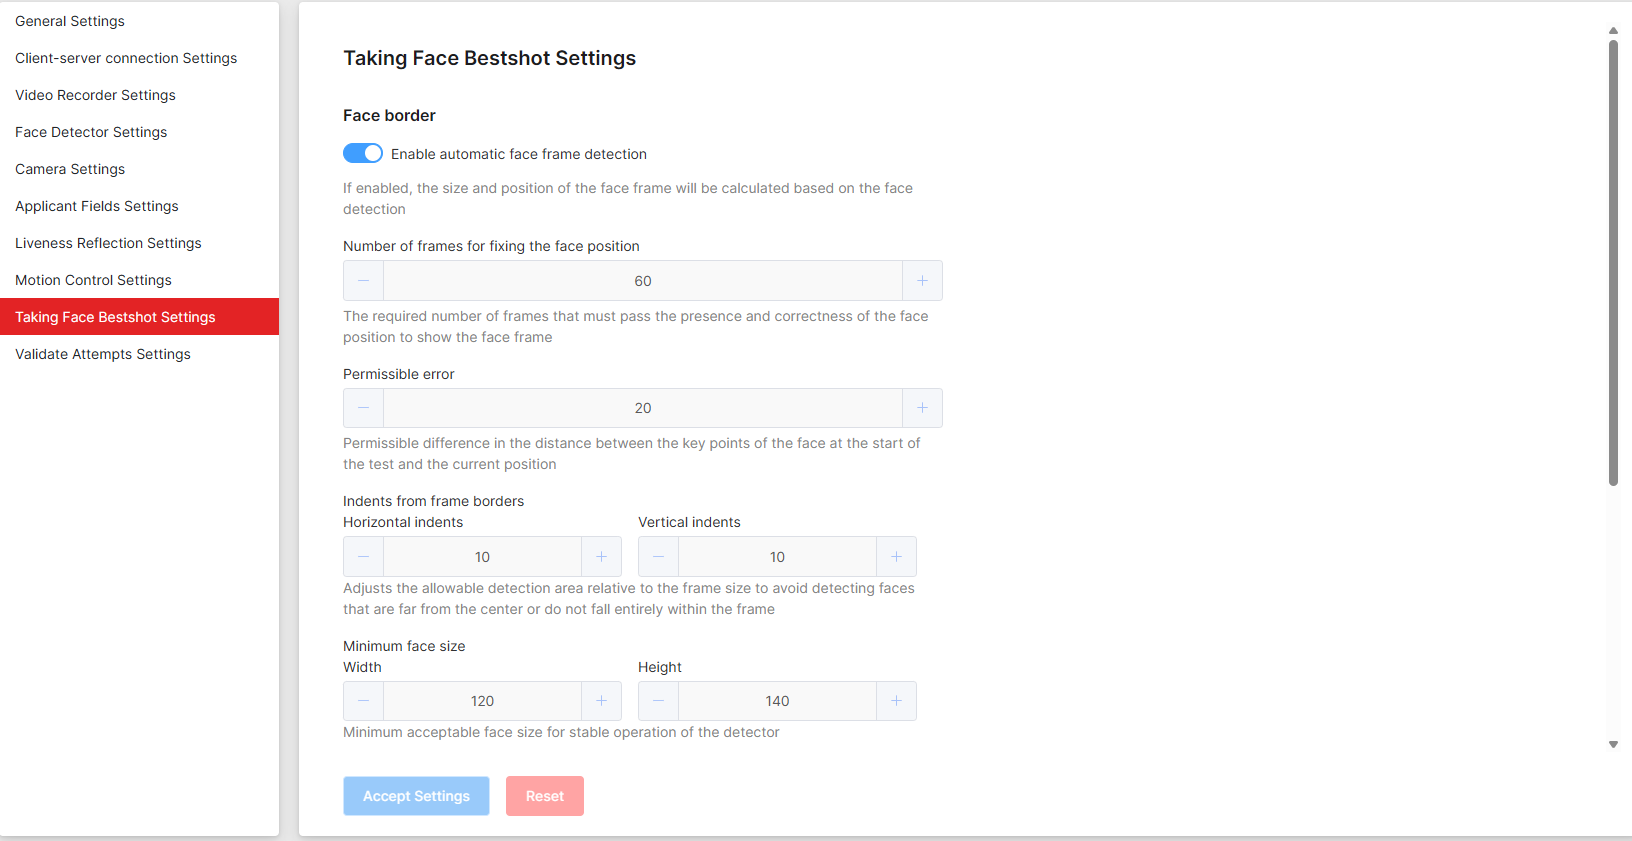
Taking face best shot settings
The following parameters of the Web component are configured:
- Face frame settings.
- Settings for additional verification of the user's immobility while taking a bestshot to maximize the quality of the resulting bestshot. (This setting requires the face detection model to be enabled)(This setting requires the face detection model to be enabled).
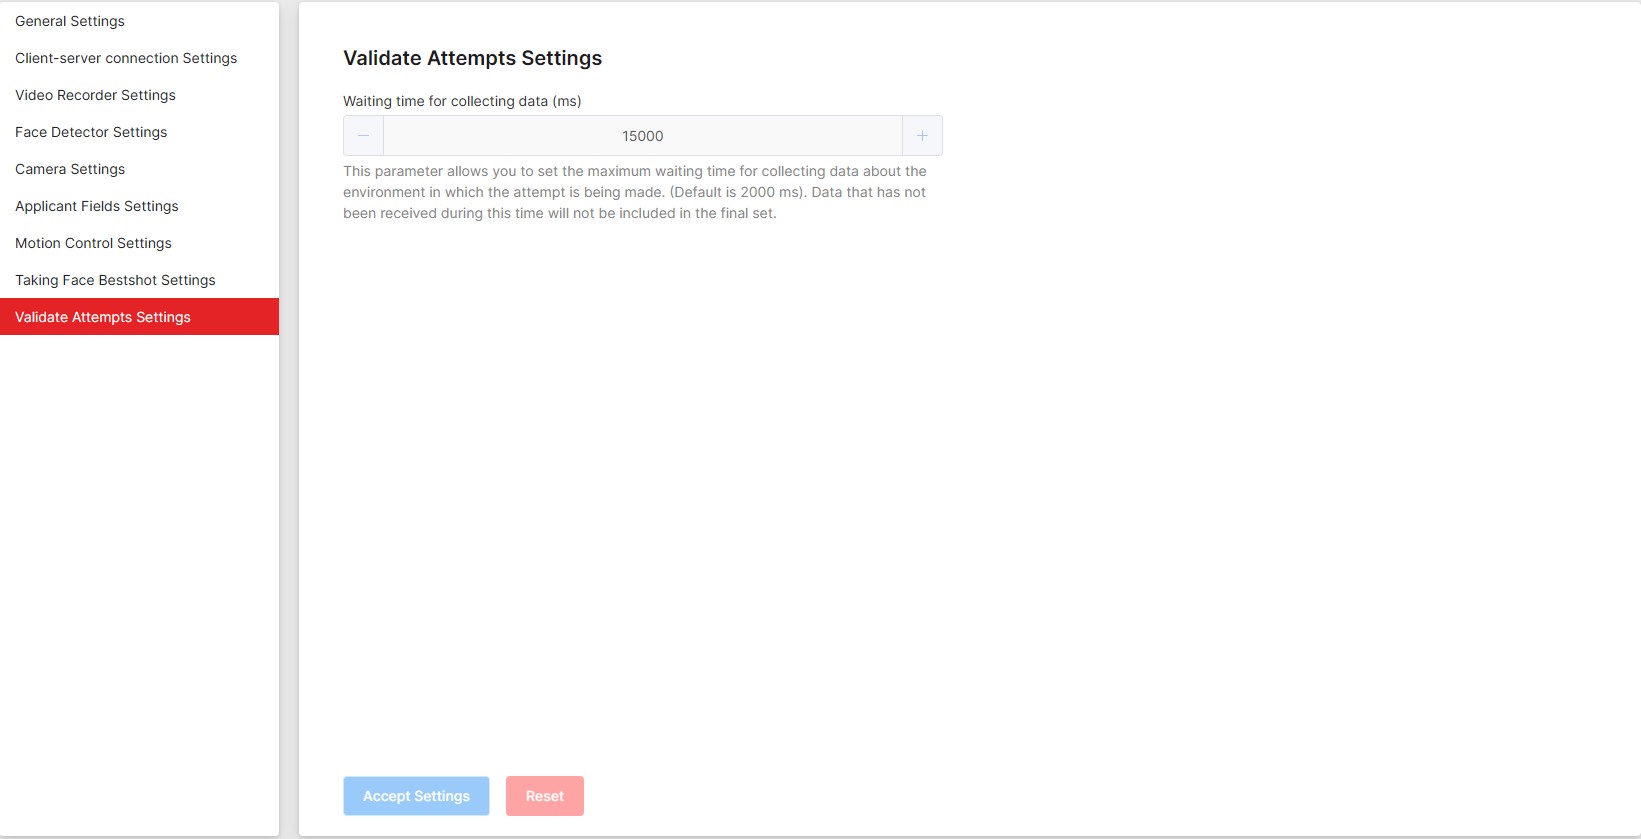
Taking validate attempts settings
The following parameters of the Web component are configured:
- Waiting time to collect data about the environment in which the attempt is made. Data that is not collected during this time will not be included in the final set.
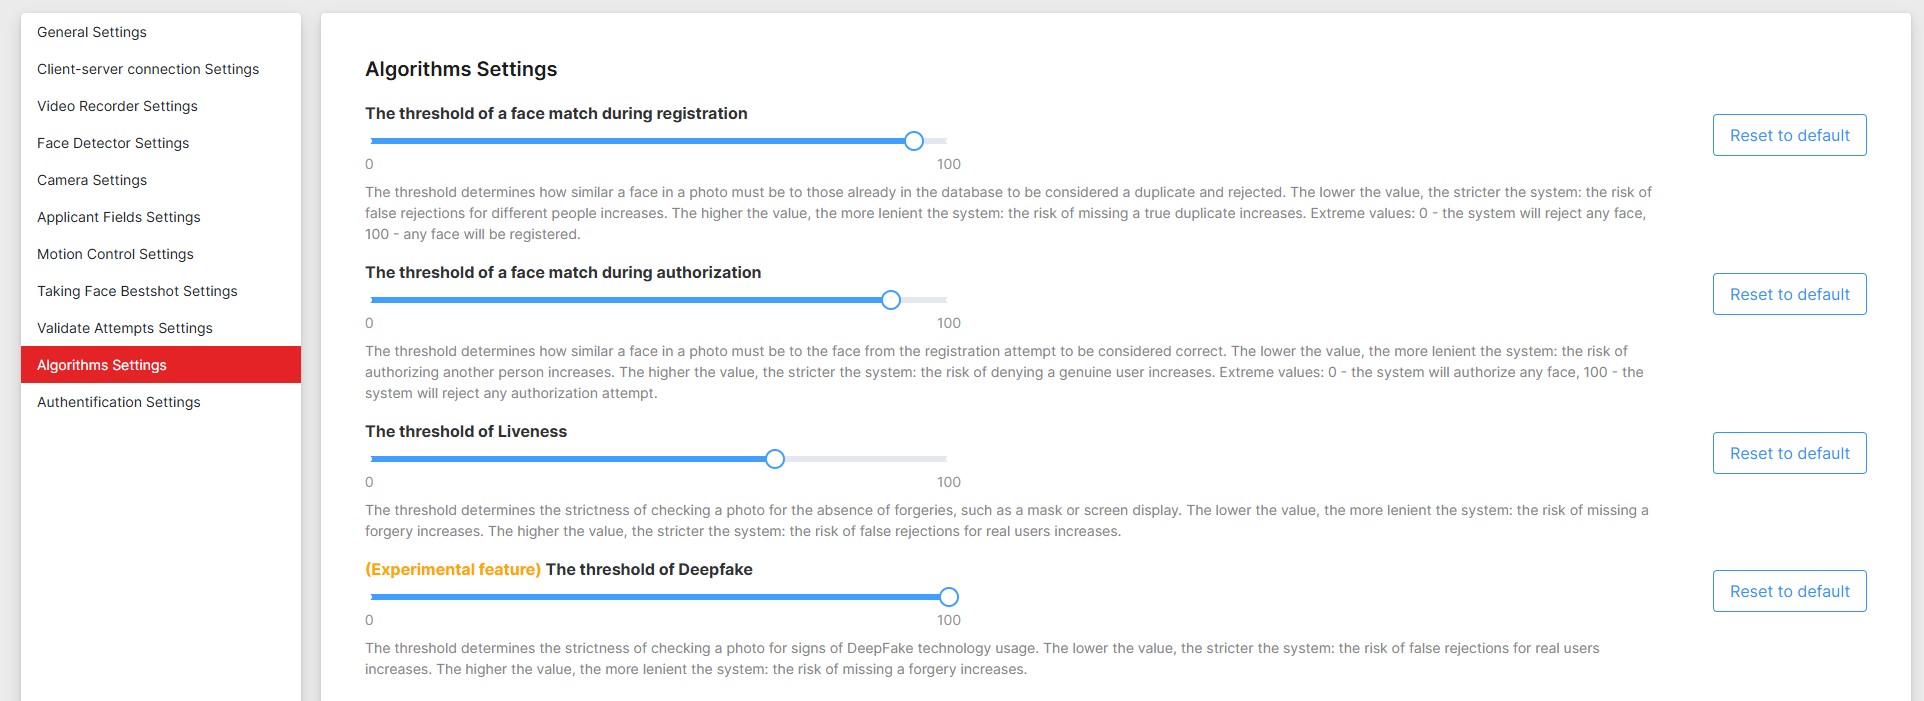
Configuring biometric algorithm thresholds
This section presents the threshold parameters for biometric algorithm triggers. These values are applied during validation of biometric data from attempts performed through this component. Adjusting the thresholds allows the system to be adapted to specific operating conditions (e.g., lighting quality, camera type, or security requirements).
Changing these values without understanding their impact may lead to system instability, false positives, or reduced security levels. It is recommended to consult our technical specialists before making any changes.
Threshold values set in the workspace settings are used as defaults for new integrations and do not affect the results of attempts.
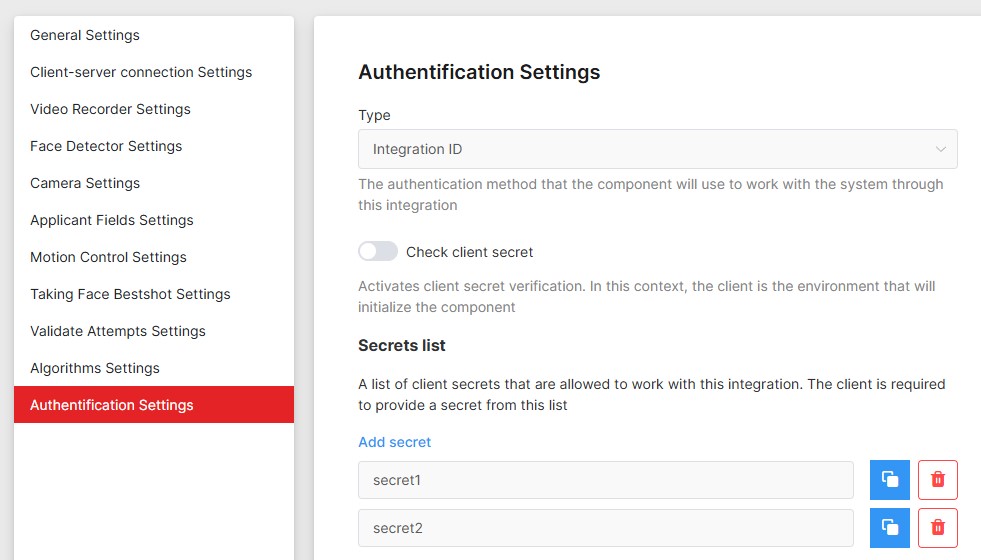
Configuring component authentication
This section presents settings that define the authentication method for the web component when accessing the server. Here you can configure the authentication method, the list of client secrets, and the flag that controls verification of these secrets.
For more information about authentication mechanisms, see the Web Components page.