Quick Start
Sign Up
For getting started with OMNI Platform, make sure that you have the following:
Personal account at OMNI Platform. To create a new account, go to Sign Up page.
Windows or Linux PC
USB-camera connected to your PC or access to the IP-camera you need to install OMNI Agent.
Install and Activate OMNI Agent
To start collecting data from your camera, you need to install and run OMNI Agent. Before installation make sure that your PC meets the following requirements:
Supported OS:
- Windows 10 (64-bit)
- Ubuntu 20.04 (64-bit)
Hardware requirements:
Minimum:
- CPU: 4 x 2GHz with AVX support
- RAM: 1GB
- HDD: 2.5GB
Recommended:
- CPU: 4 x 3.1 GHz with AVX support
- RAM: 2GB
- HDD: 2.5+GB
Specified requirements correspond to 1 video stream in 1080p (Full HD) and 5 persons in the frame at the same time (database size up to 50К faces).
Notes:
- If you use Windows, you might need to install Microsoft Visual C++ Redistributable for Visual Studio before installing OMNI Agent.
- If you use Linux, you need to set up the execution permission for the installer before running:
- Go to the directory, where OMNI Agent installer is downloaded to, and click the right button on the installation file.
- Open Properties, go to the Permission tab, and check Allow execute checkbox.
To install and activate OMNI Agent, follow the instructions below:
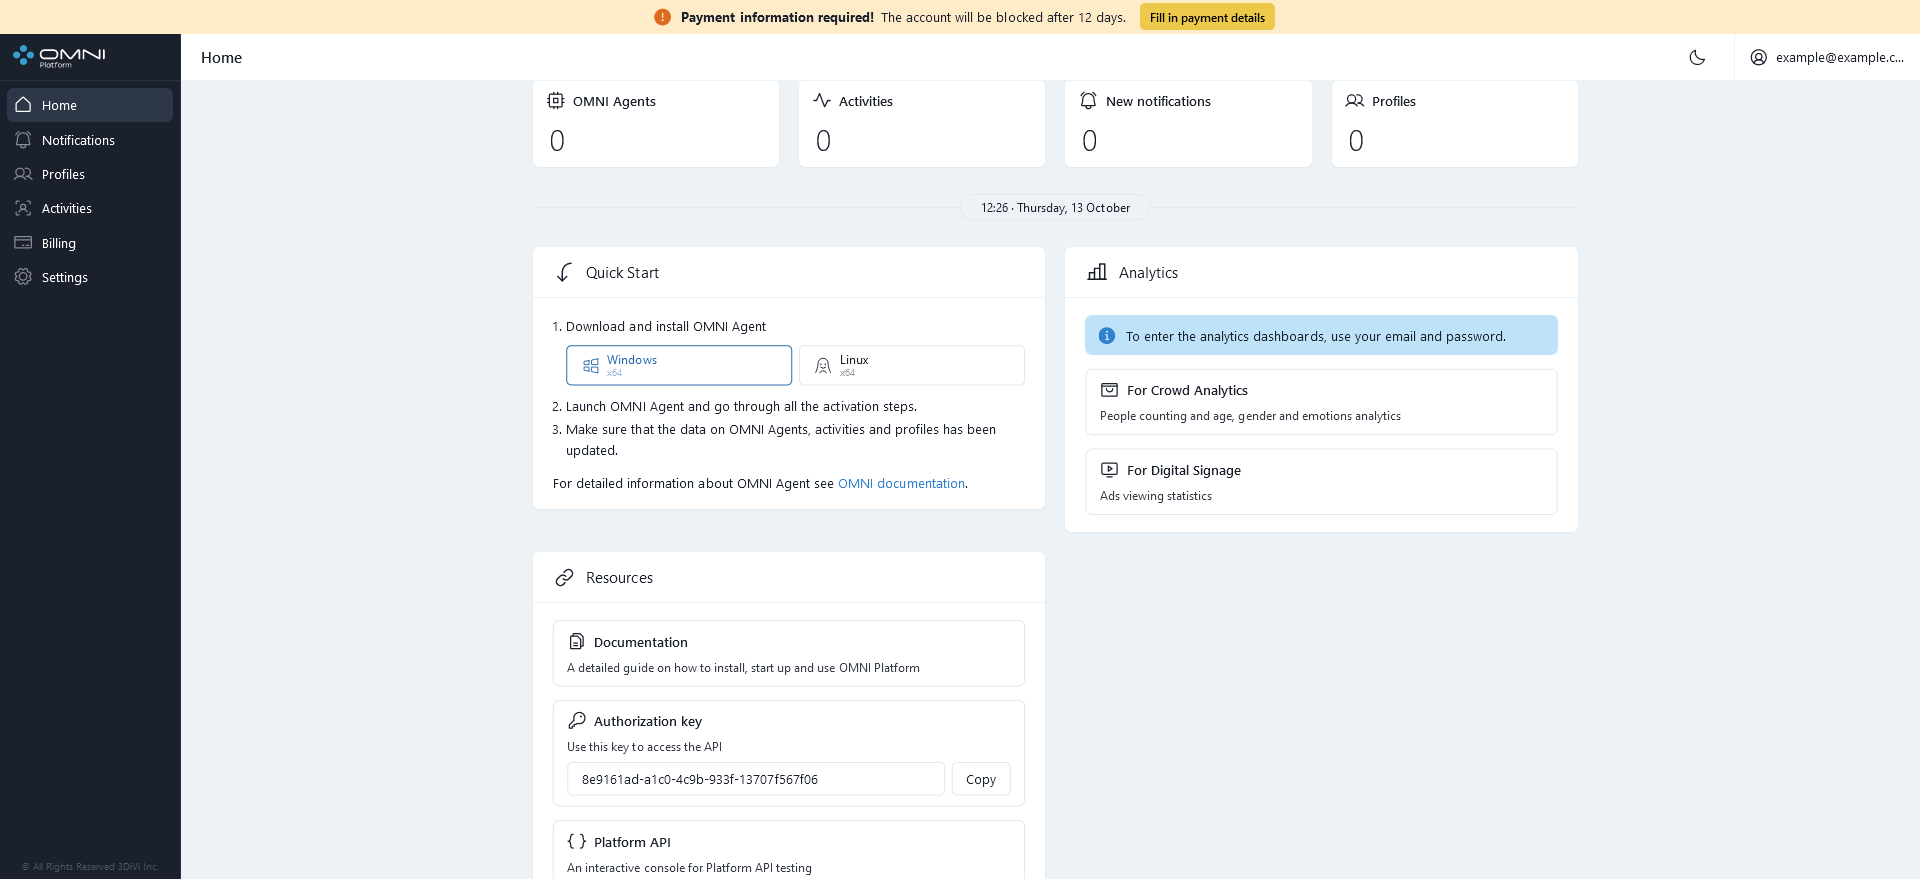
- After sign up is completed, sign in to your OMNI Platform account. As a result, you'll be redirected to the web interface. On the home page go to Quick Start panel and download OMNI Agent installer for your OS:
- Once the downloading is completed, run OMNI Agent installer and follow the installation wizard's instructions.
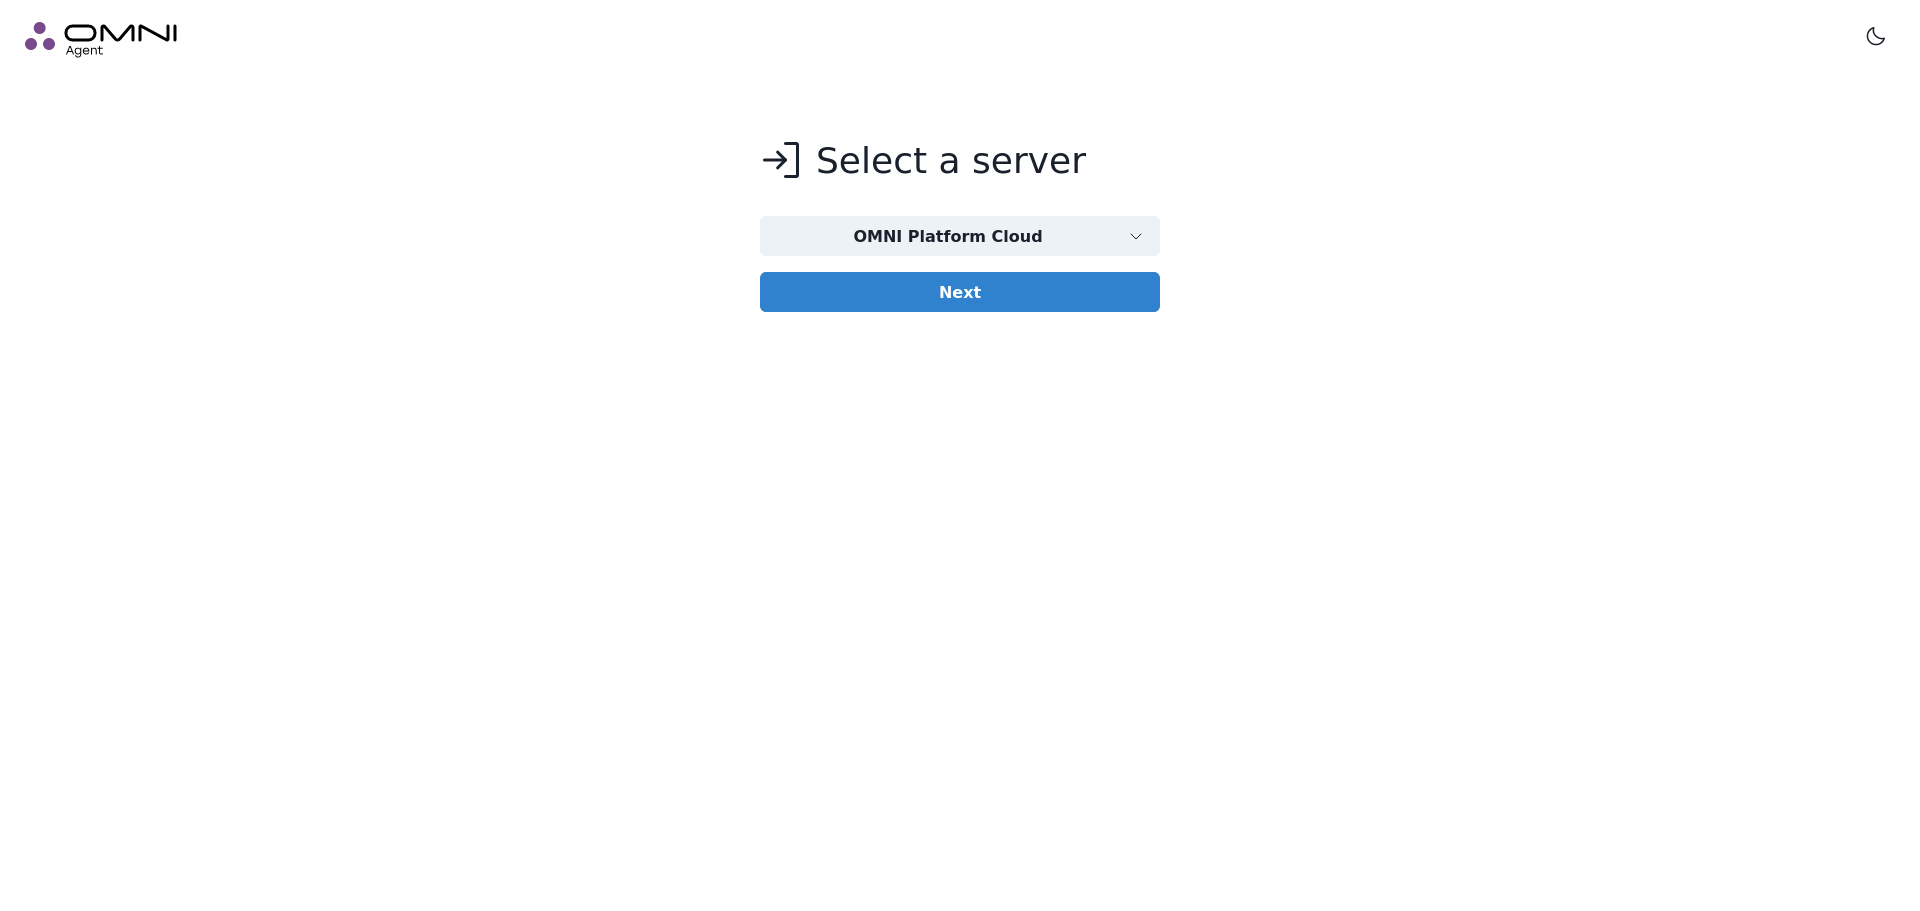
- After completing the installation, run OMNI Agent, select the cloud version at appeared OMNI Agent web page and click on Next button.
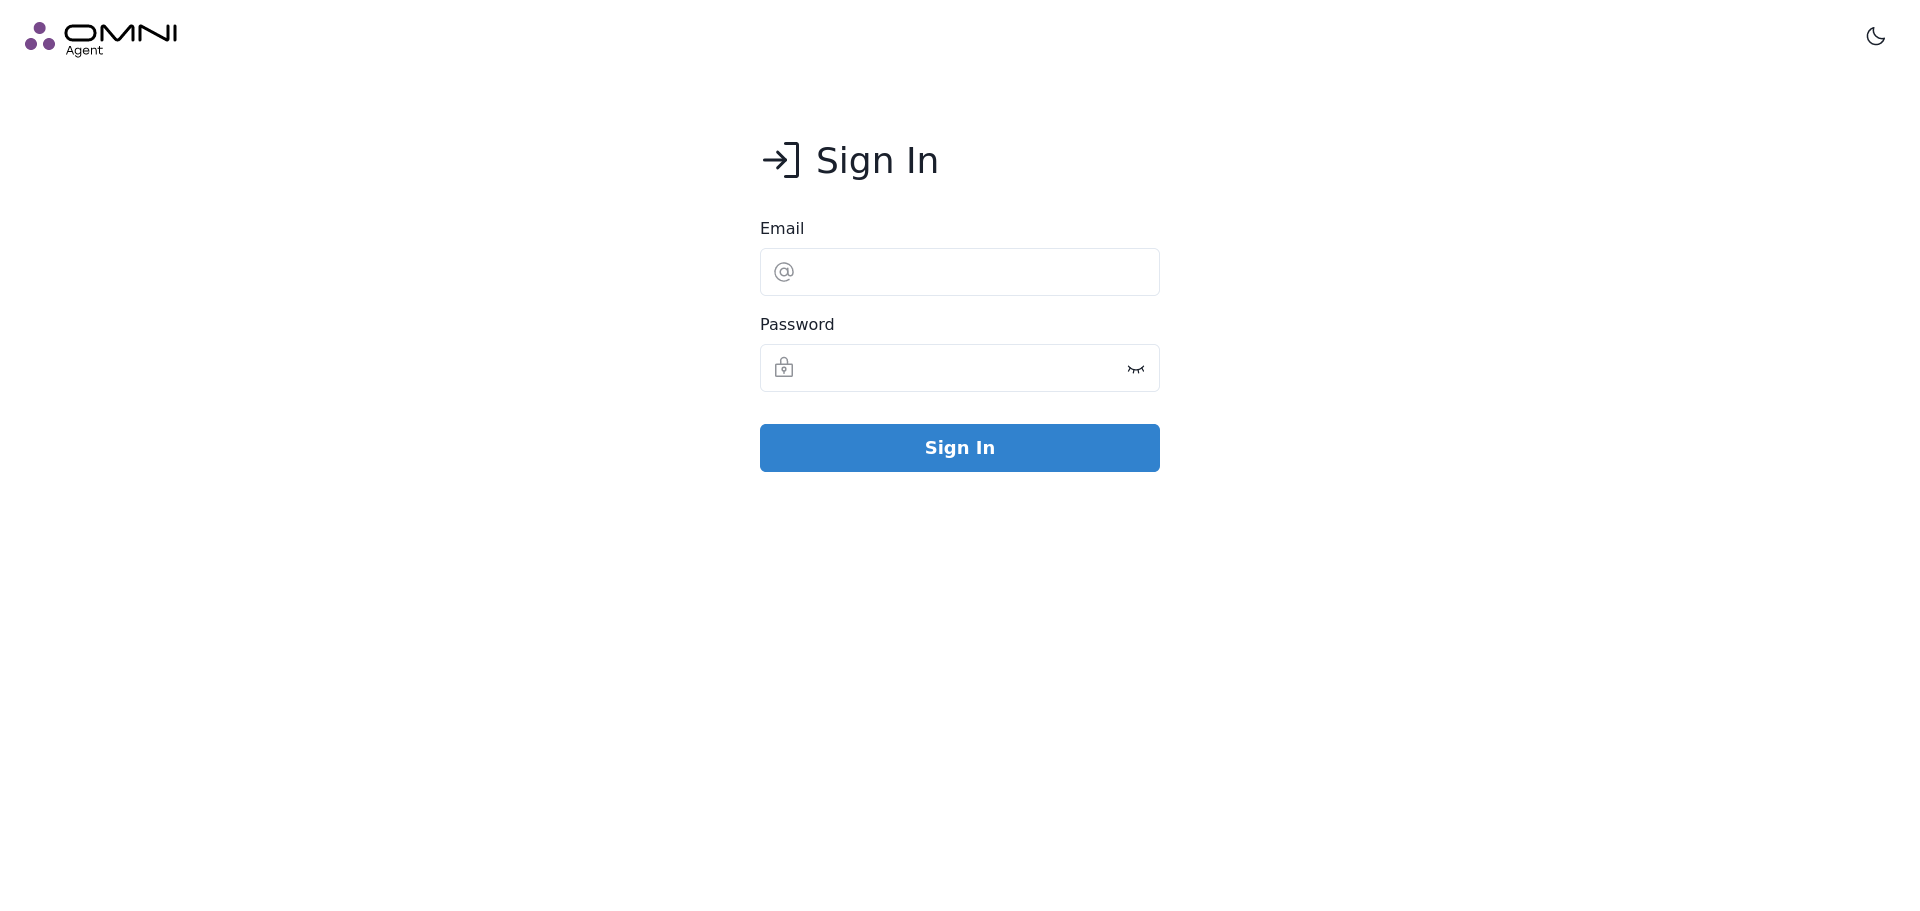
- Sign in to OMNI Agent using email and password of your OMNI Platform account.
- Add an IP or USB camera:
- To use an IP camera, enter the camera URL.
- To use a USB camera, connect the camera to your PC and select it from the list of connected cameras.
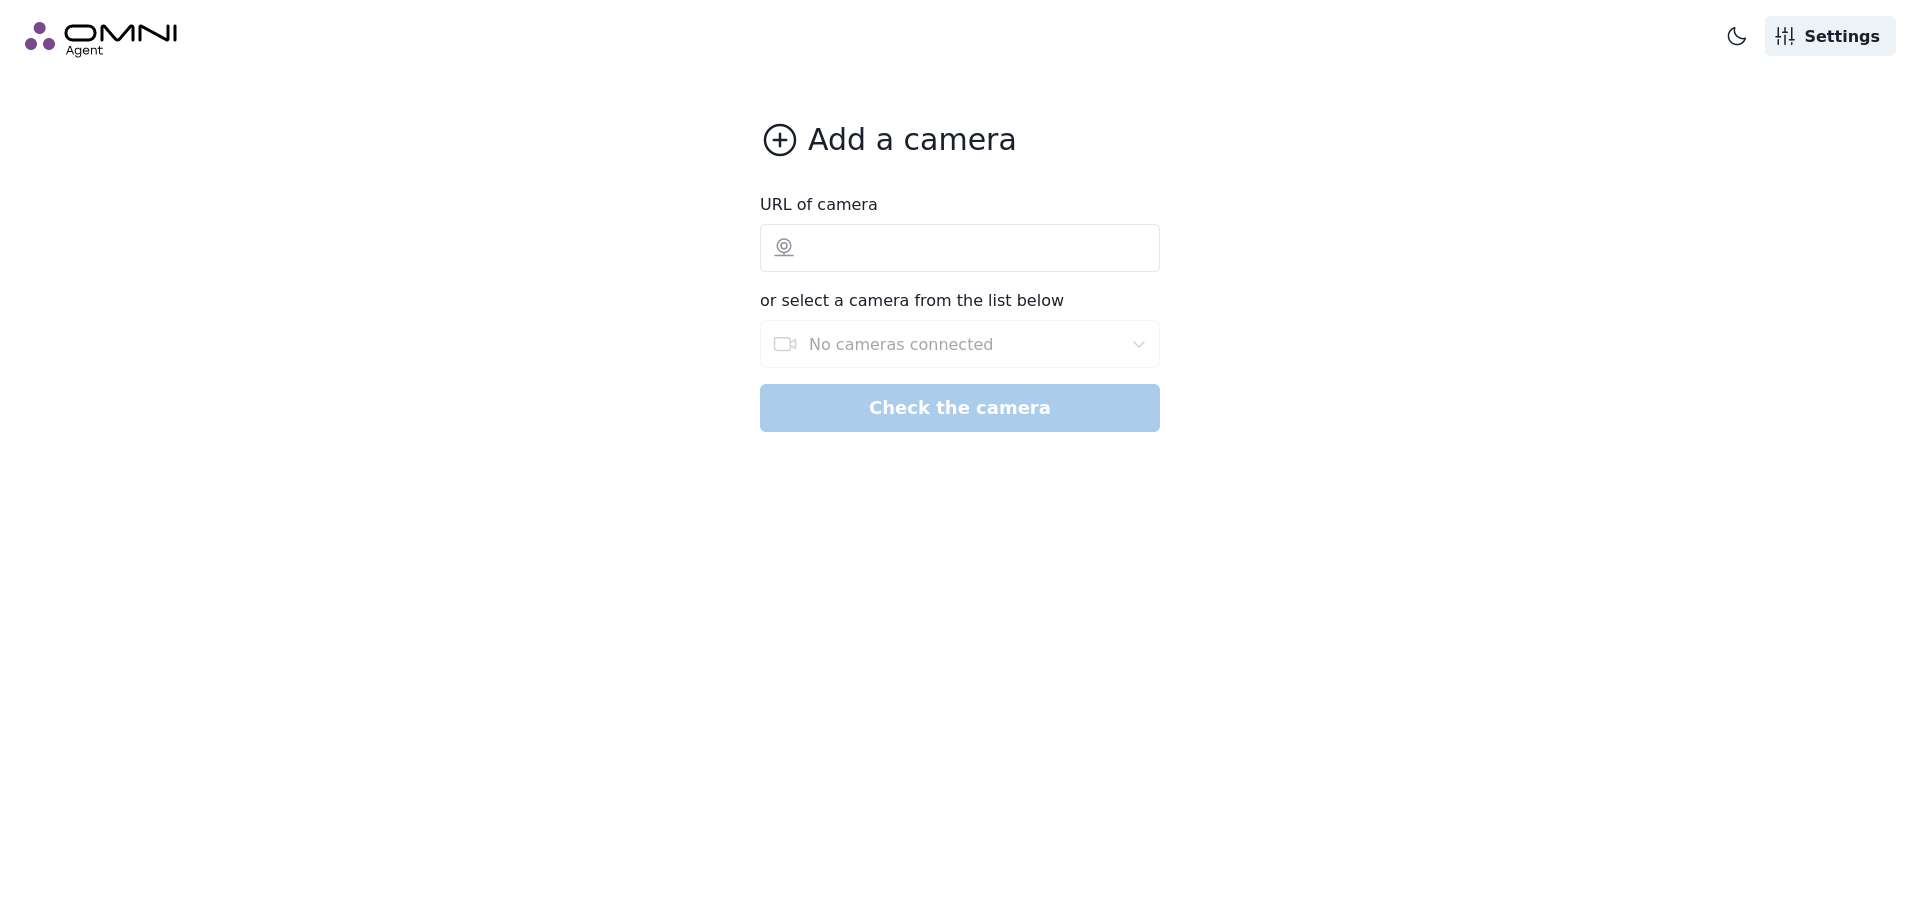
To apply settings, click on Check the camera button. As a result, the camera checking page will appear in your web browser.
- At the camera checking page you can see the video from the camera and the information about the detected persons (their gender, age, emotions, etc.). The detected faces and silhouettes can be highlighted as follows:
- Red circle: a face is detected but the person attention is none
- White circle: both a face and the person attention are detected
- Dotted circle: image quality is insufficient or head rotation angle is not applicable for proper detection
- Green circle: a face is detected and recognized but the person attention is not registered
- Orange circle: a face is detected and recognized and the person attention is registered
- Green bounding box: a human silhouette is detected and has an ID
- Red bounding box: a human silhouette is detected, but an ID is not assigned yet
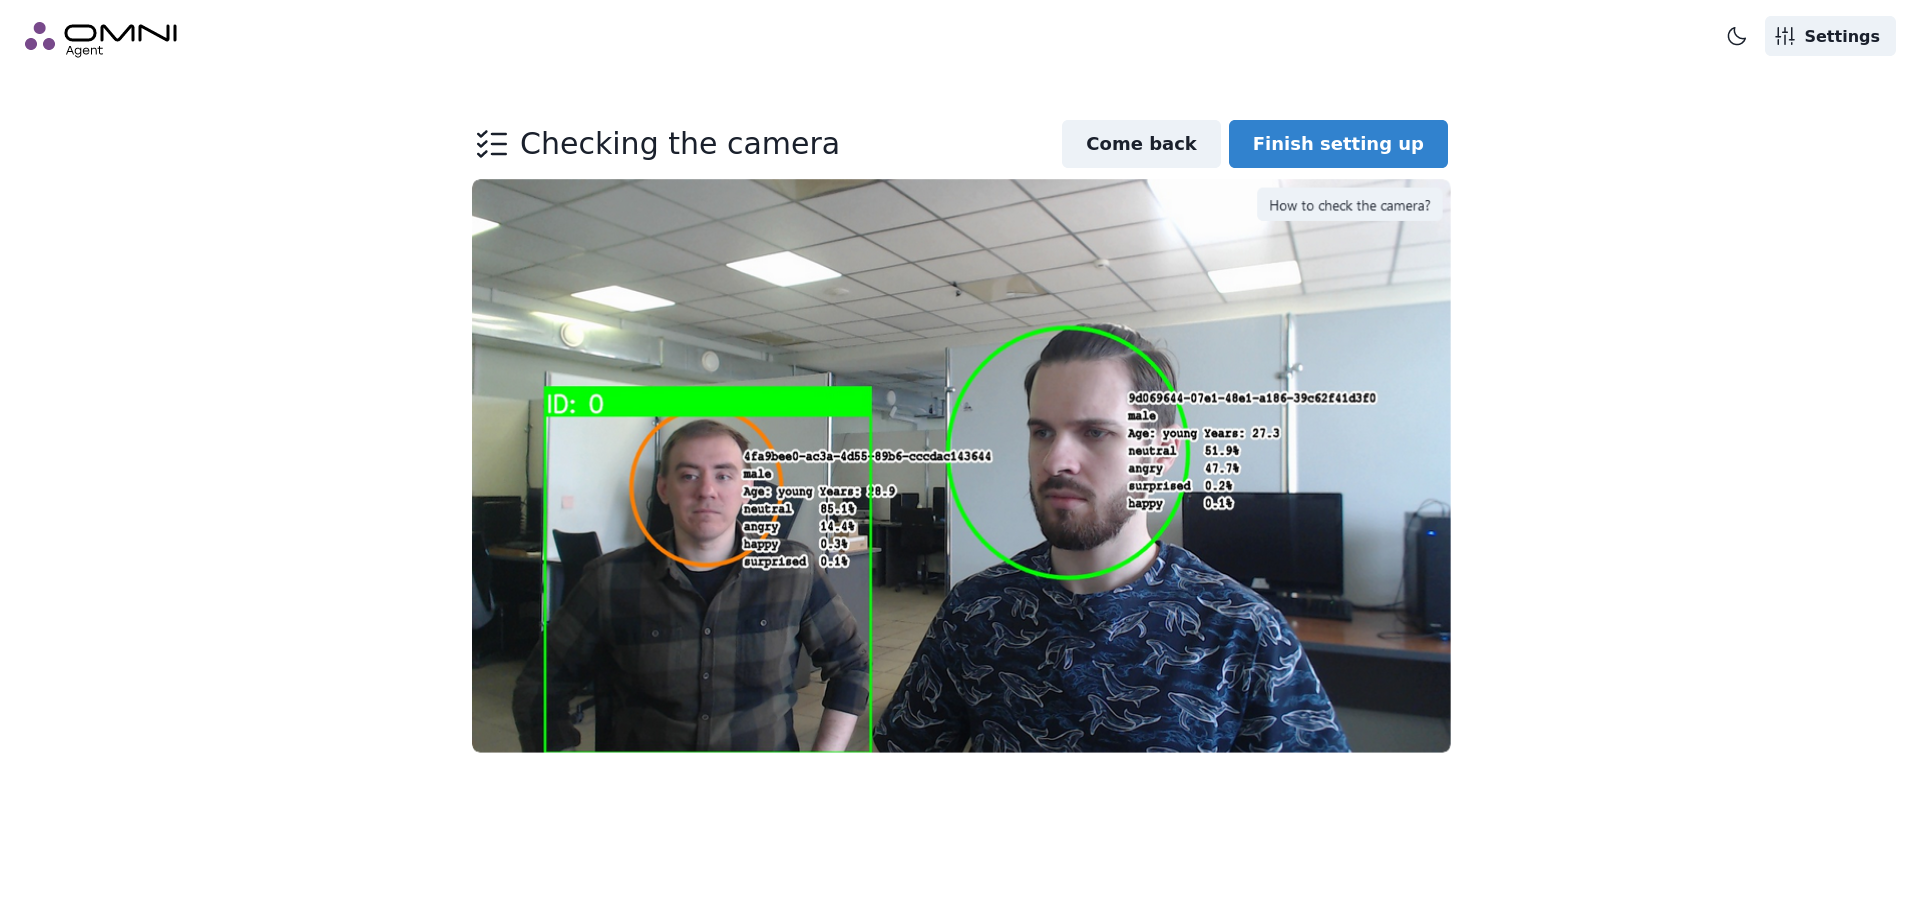
- To save the camera settings, click on Finish setting up button. As a result, you'll see OMNI Agent status page.
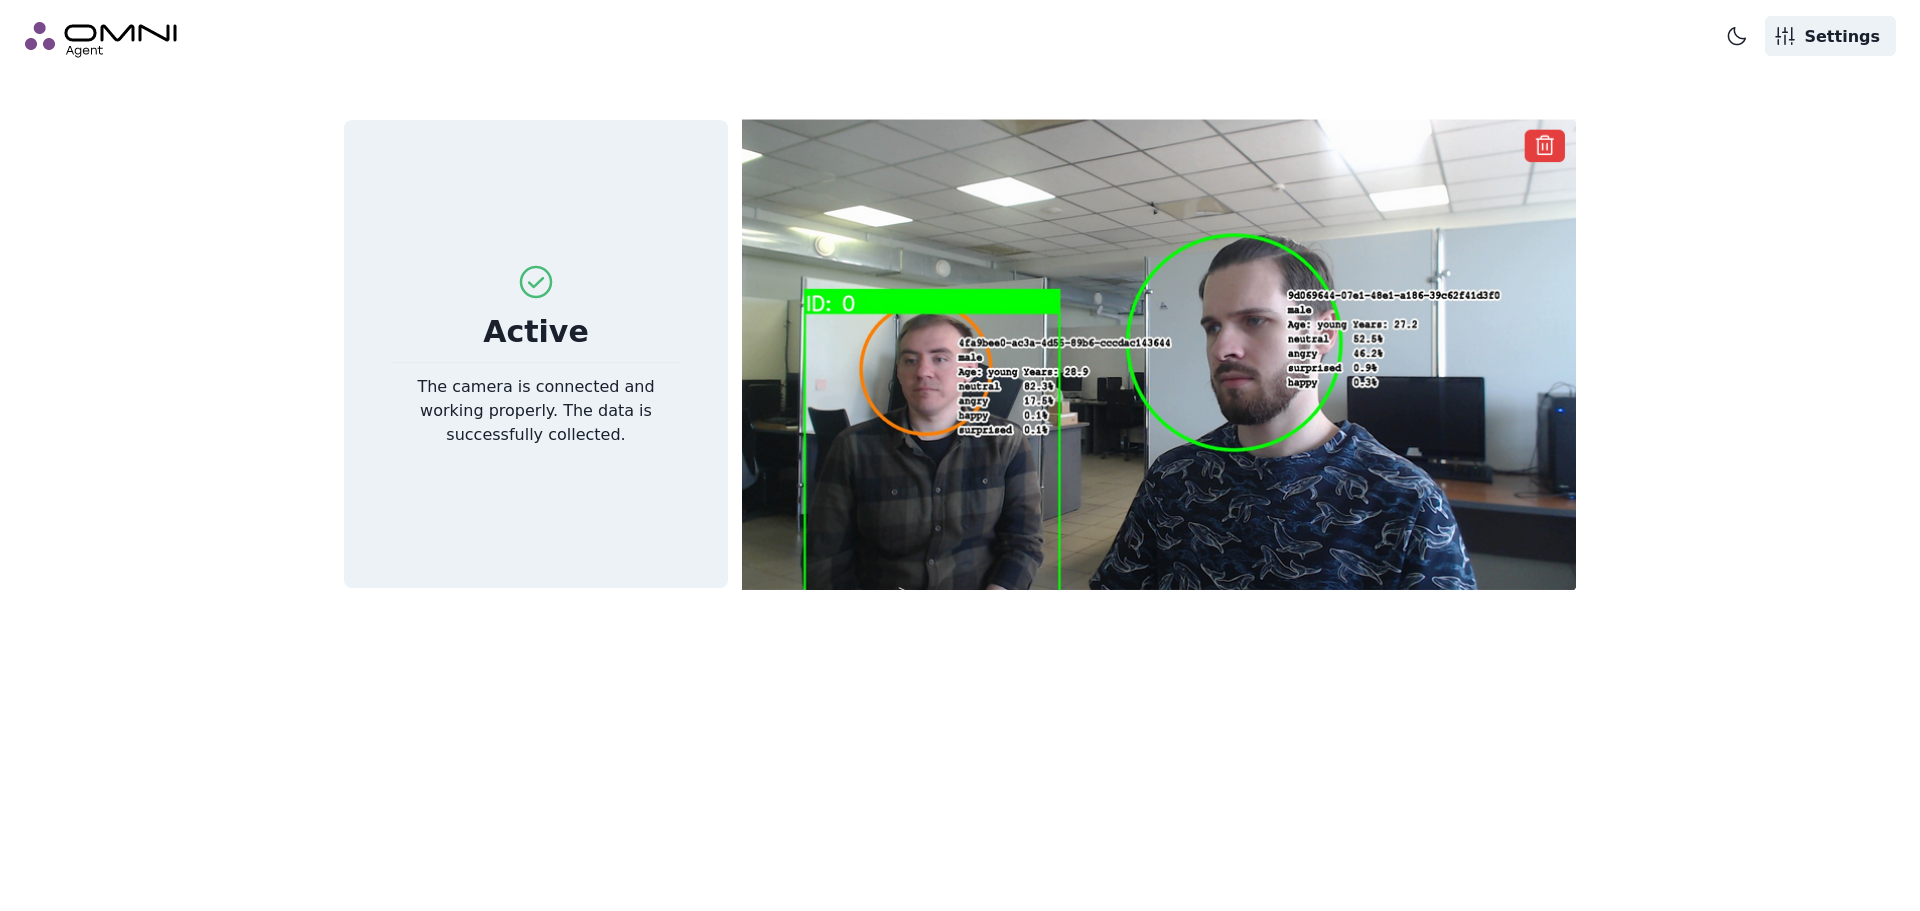
To protect the personal data, OMNI Platform has the anonymous mode enabled by default. In the anonymous mode face images aren’t stored at OMNI Platform to ensure personal data protection and exclude a possibility of person recognition outside the system. To enable/disable the anonymous mode, click on Settings icon at OMNI Agent status page and select an appropriate option in the opened tab.
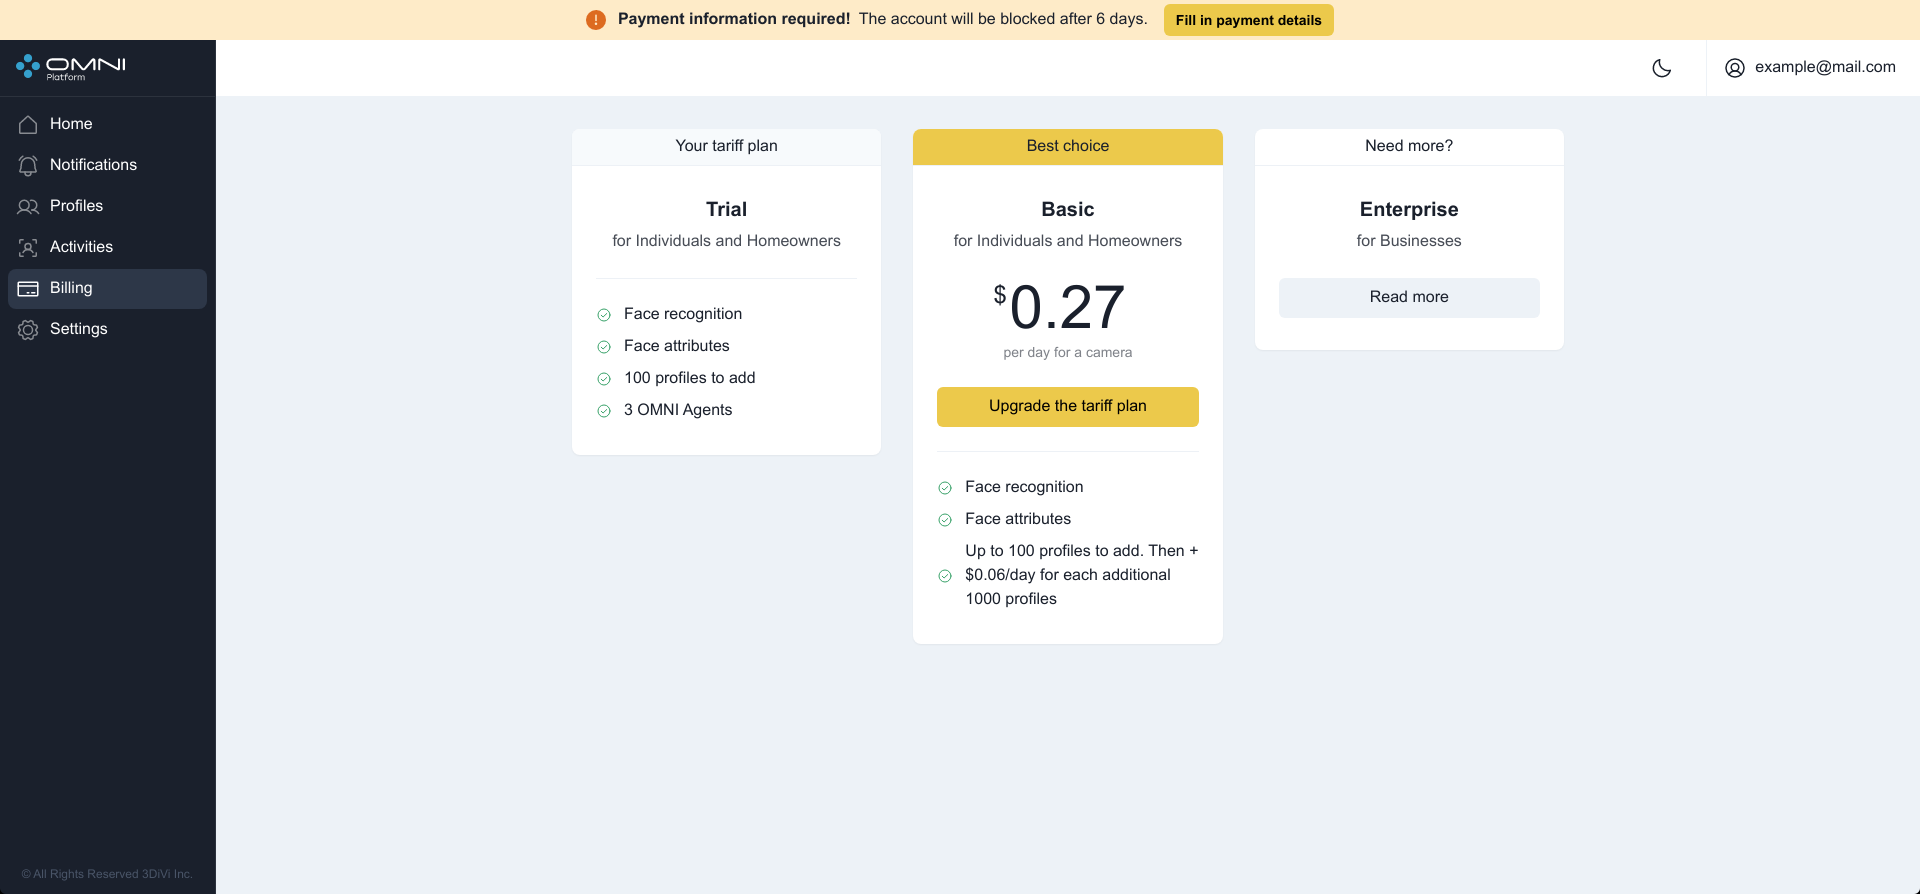
Billing
3DiVi offers 14-day free trial to new users that starts after creating the account at OMNI Platform. Within this period you're able to choose a tariff plan and fill in the payment details to ensure uninterrupted operation and service. For more information about Basic and Enterprise tariffs, please refer to Billing section.
Now it's time to try out OMNI Platform functionality.
To proceed with a cloud version, follow OMNI Platform (Cloud) User Guide.Good luck and thank you for building the intelligent world with 3DiVi!