Triggers
Trigger is an object needed to create and send a notification to endpoints if the activity data satisfies the trigger condition. Trigger contains a trigger condition, a set of endpoints, and ID of the watchlist it is attached to.
Create Triggers
When creating an account, the system automatically creates a trigger for My persons watchlist with an endpoint attached. You can view this trigger at Triggers section of Settings page.
To create a trigger, do the following:
- Open Settings page, select Triggers section and click on Create a Trigger button.
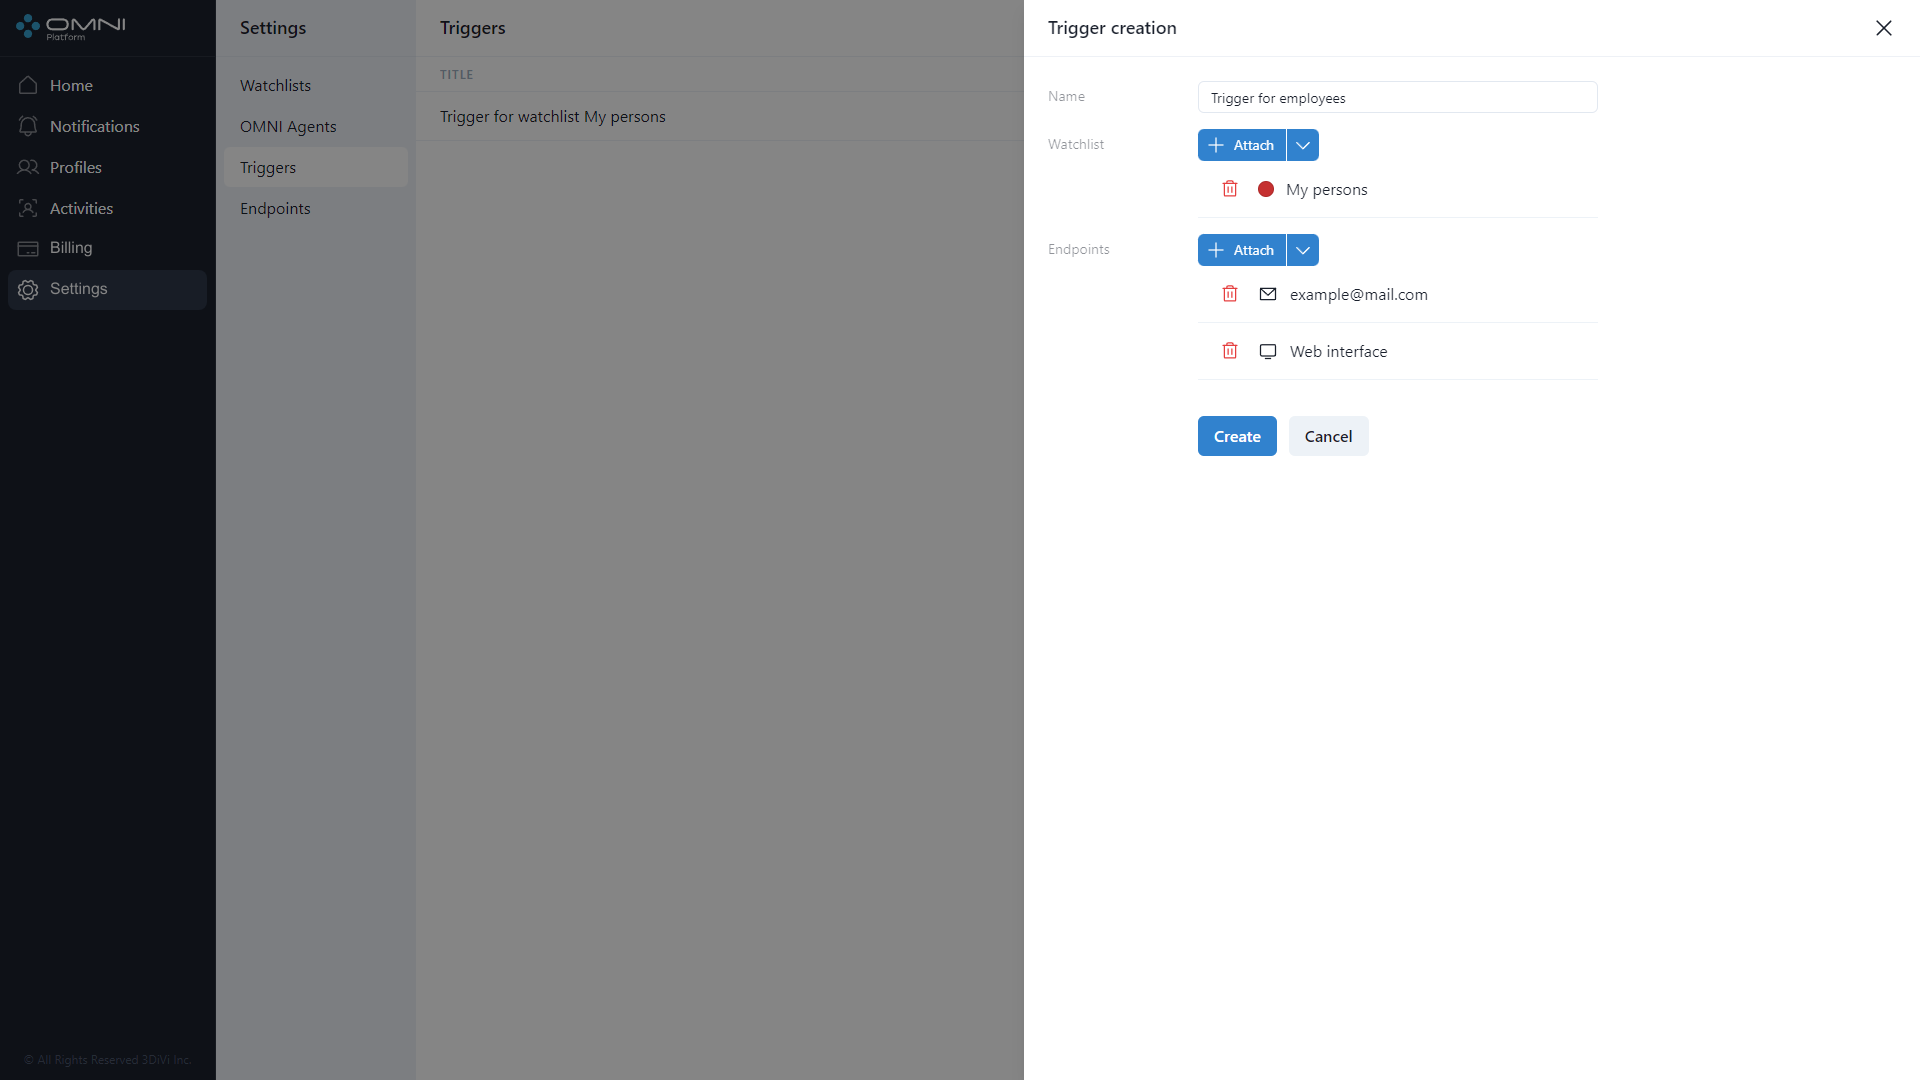
- Fill in a trigger name, then select a watchlist and attach endpoints.
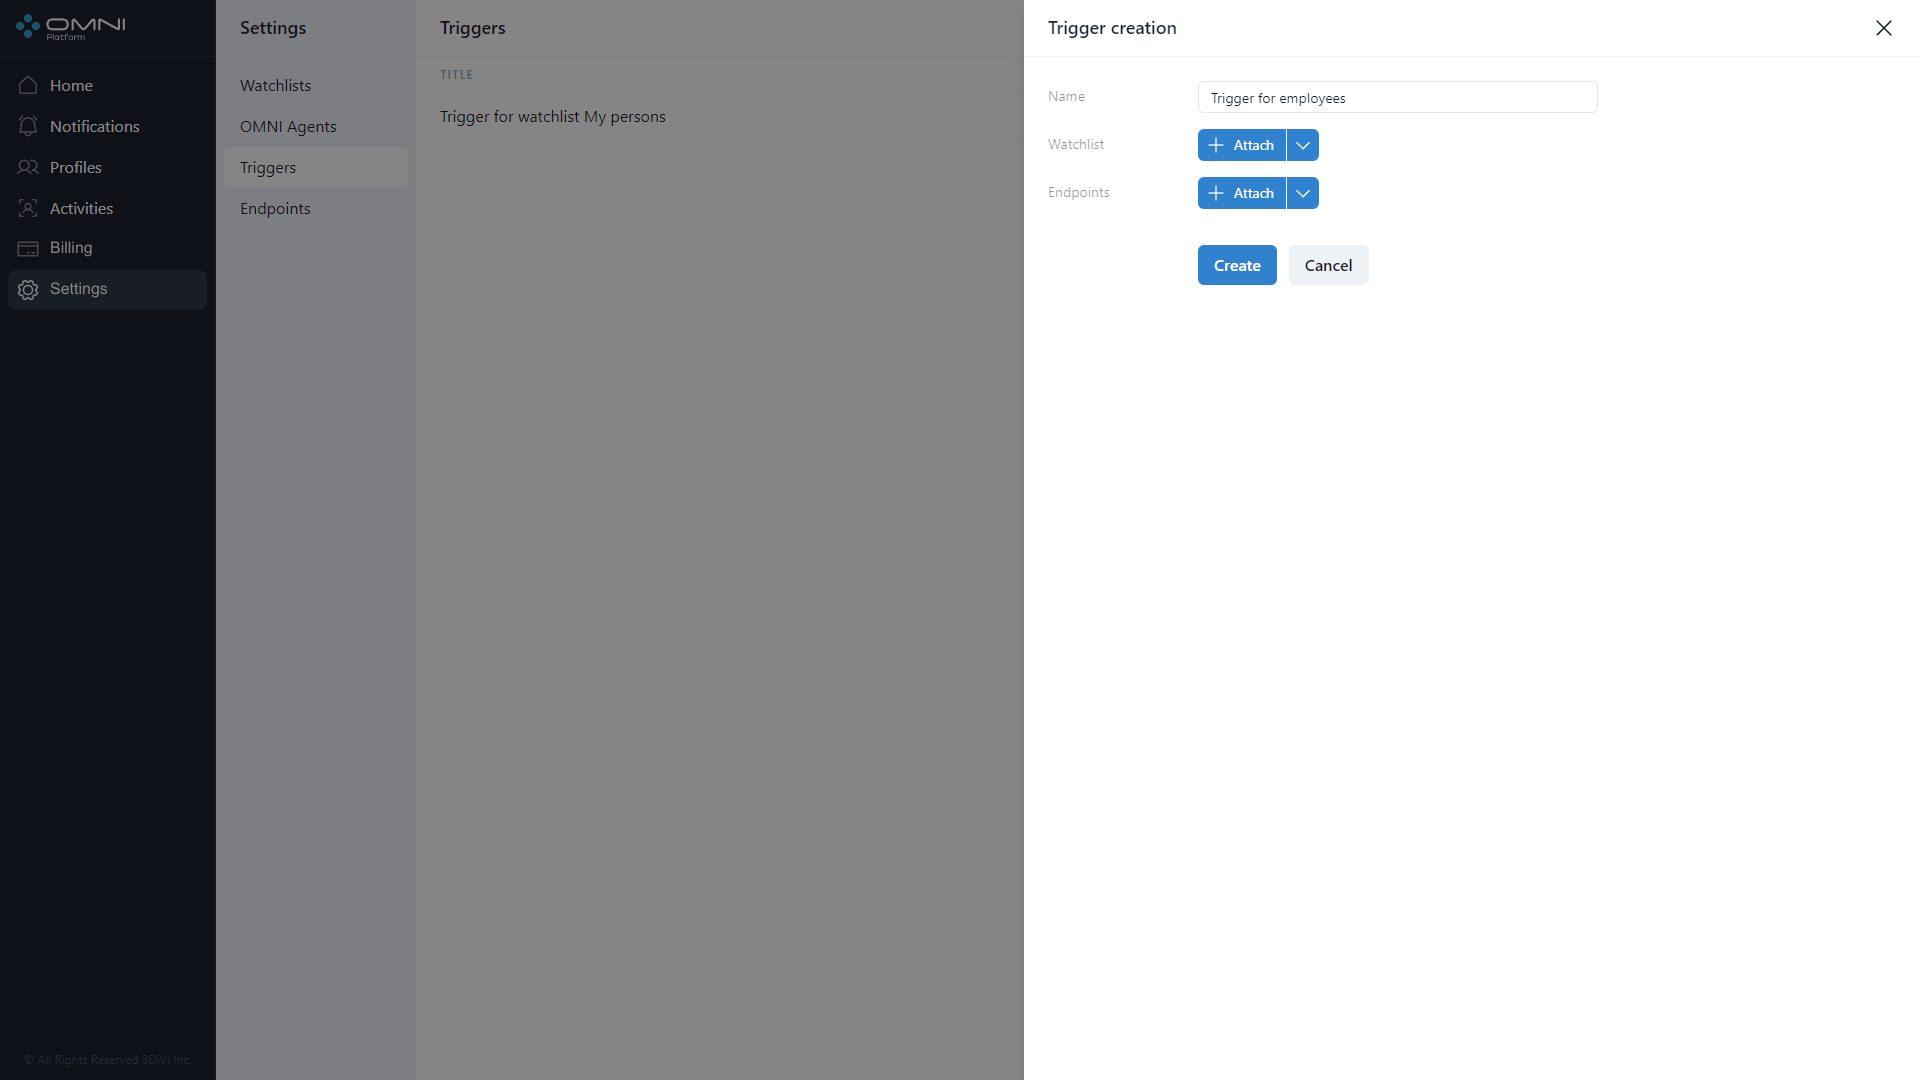
To select a watchlist, click Attach button.
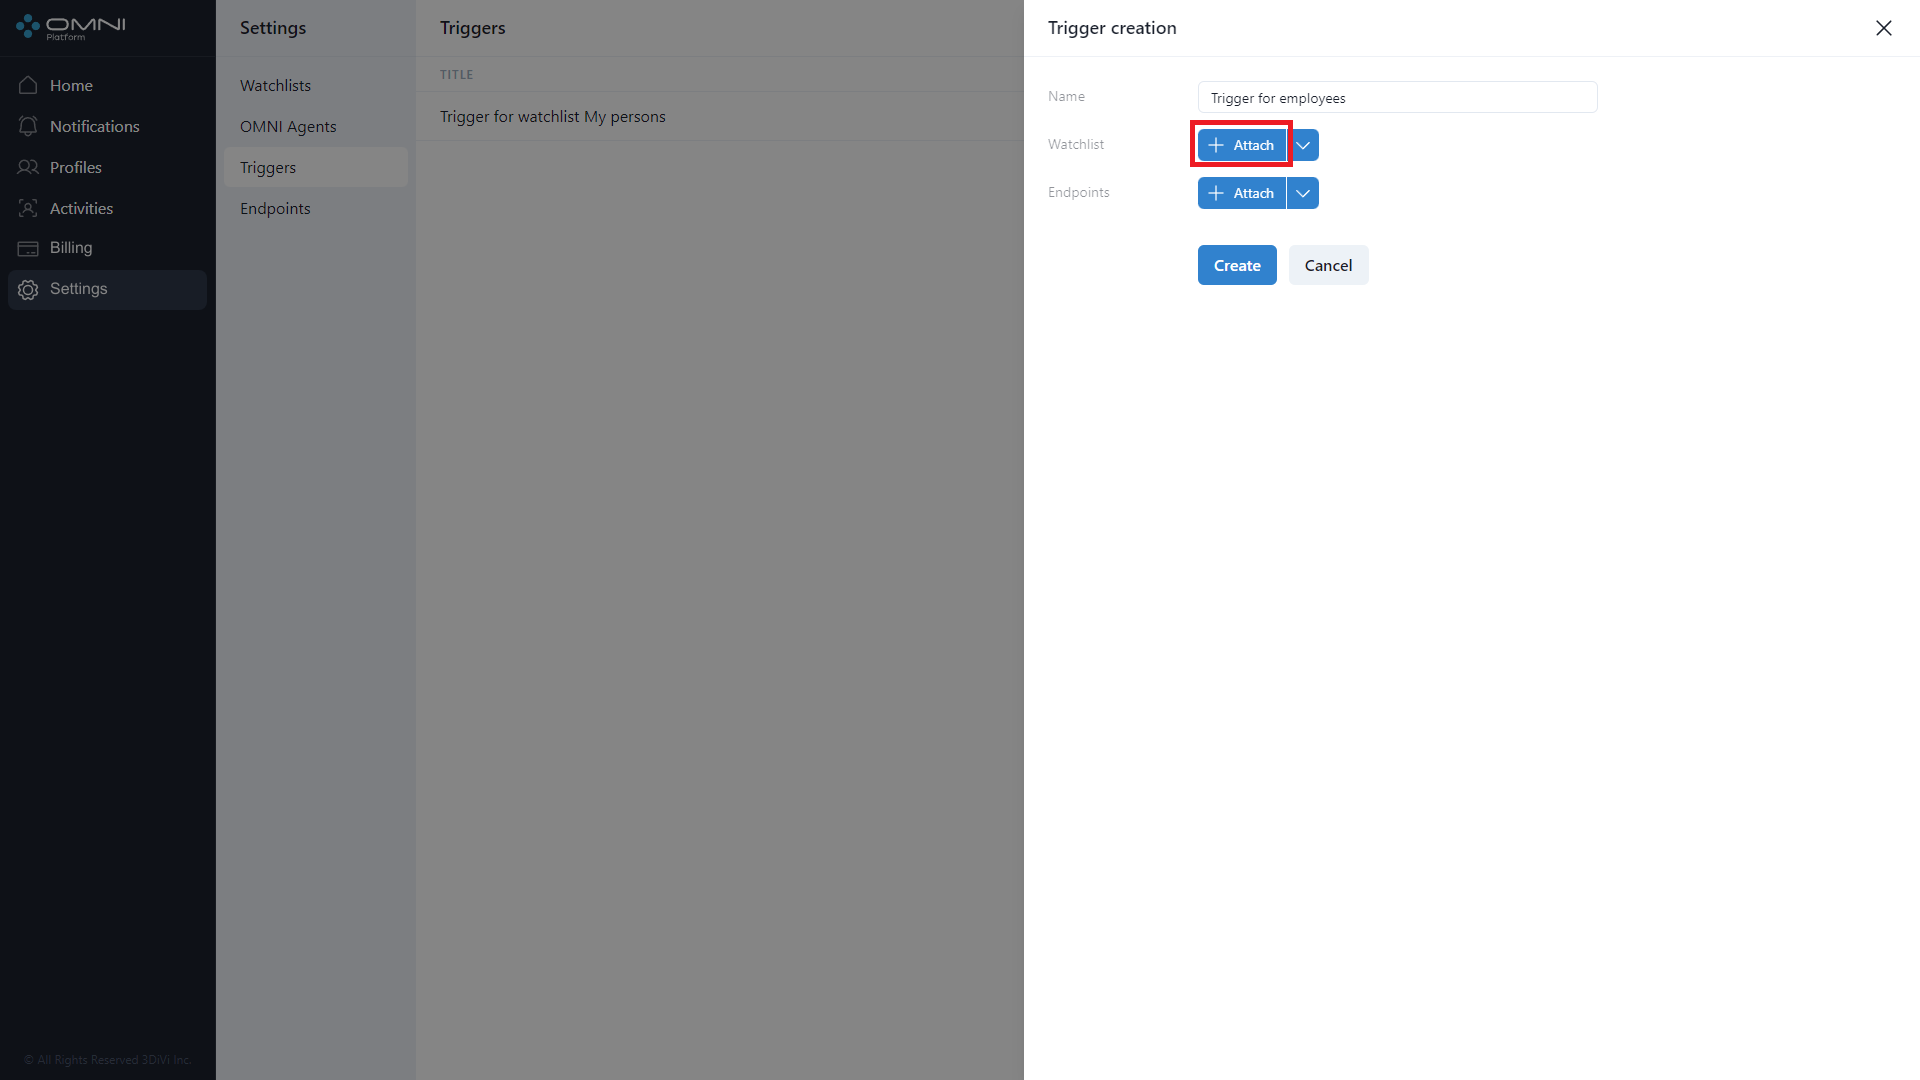
As a result, you'll see a list of previously created watchlists. Select the required watchlist and click Add button.
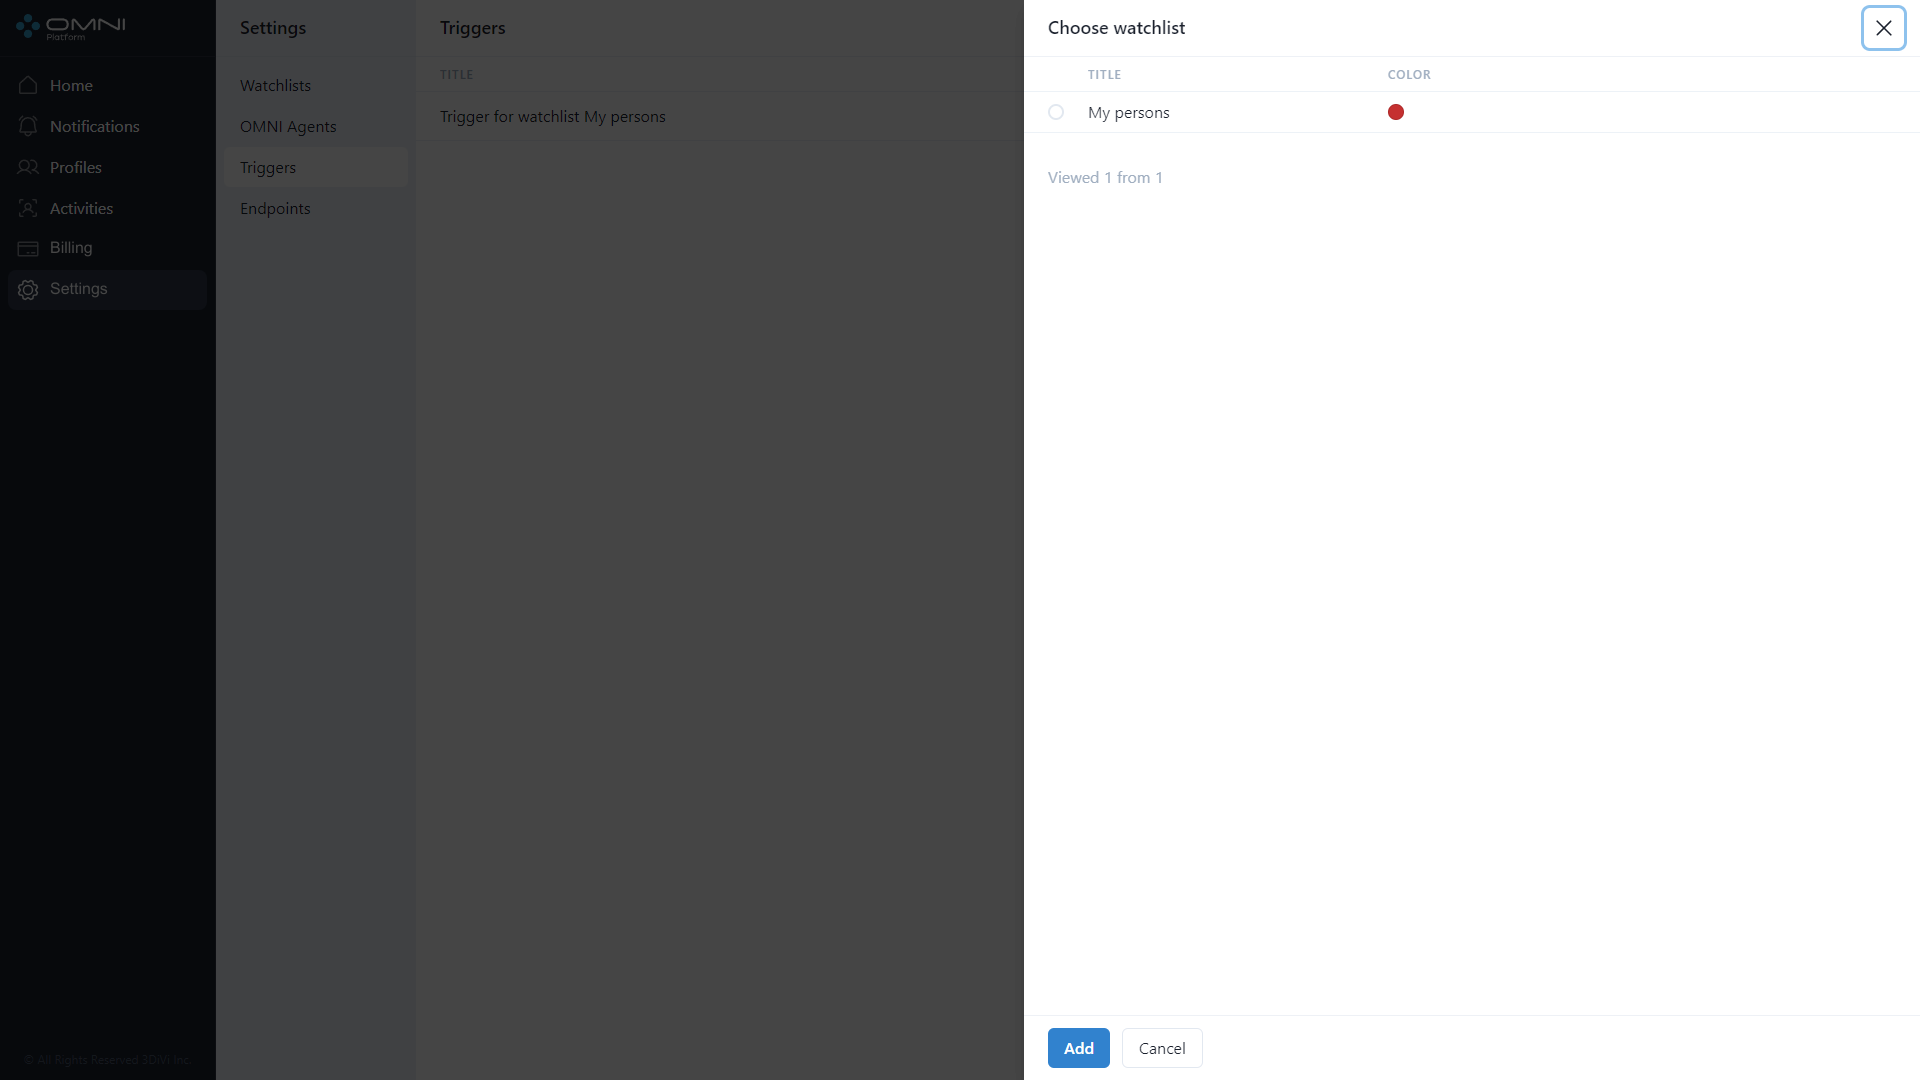
This watchlist will be attached to the created trigger.
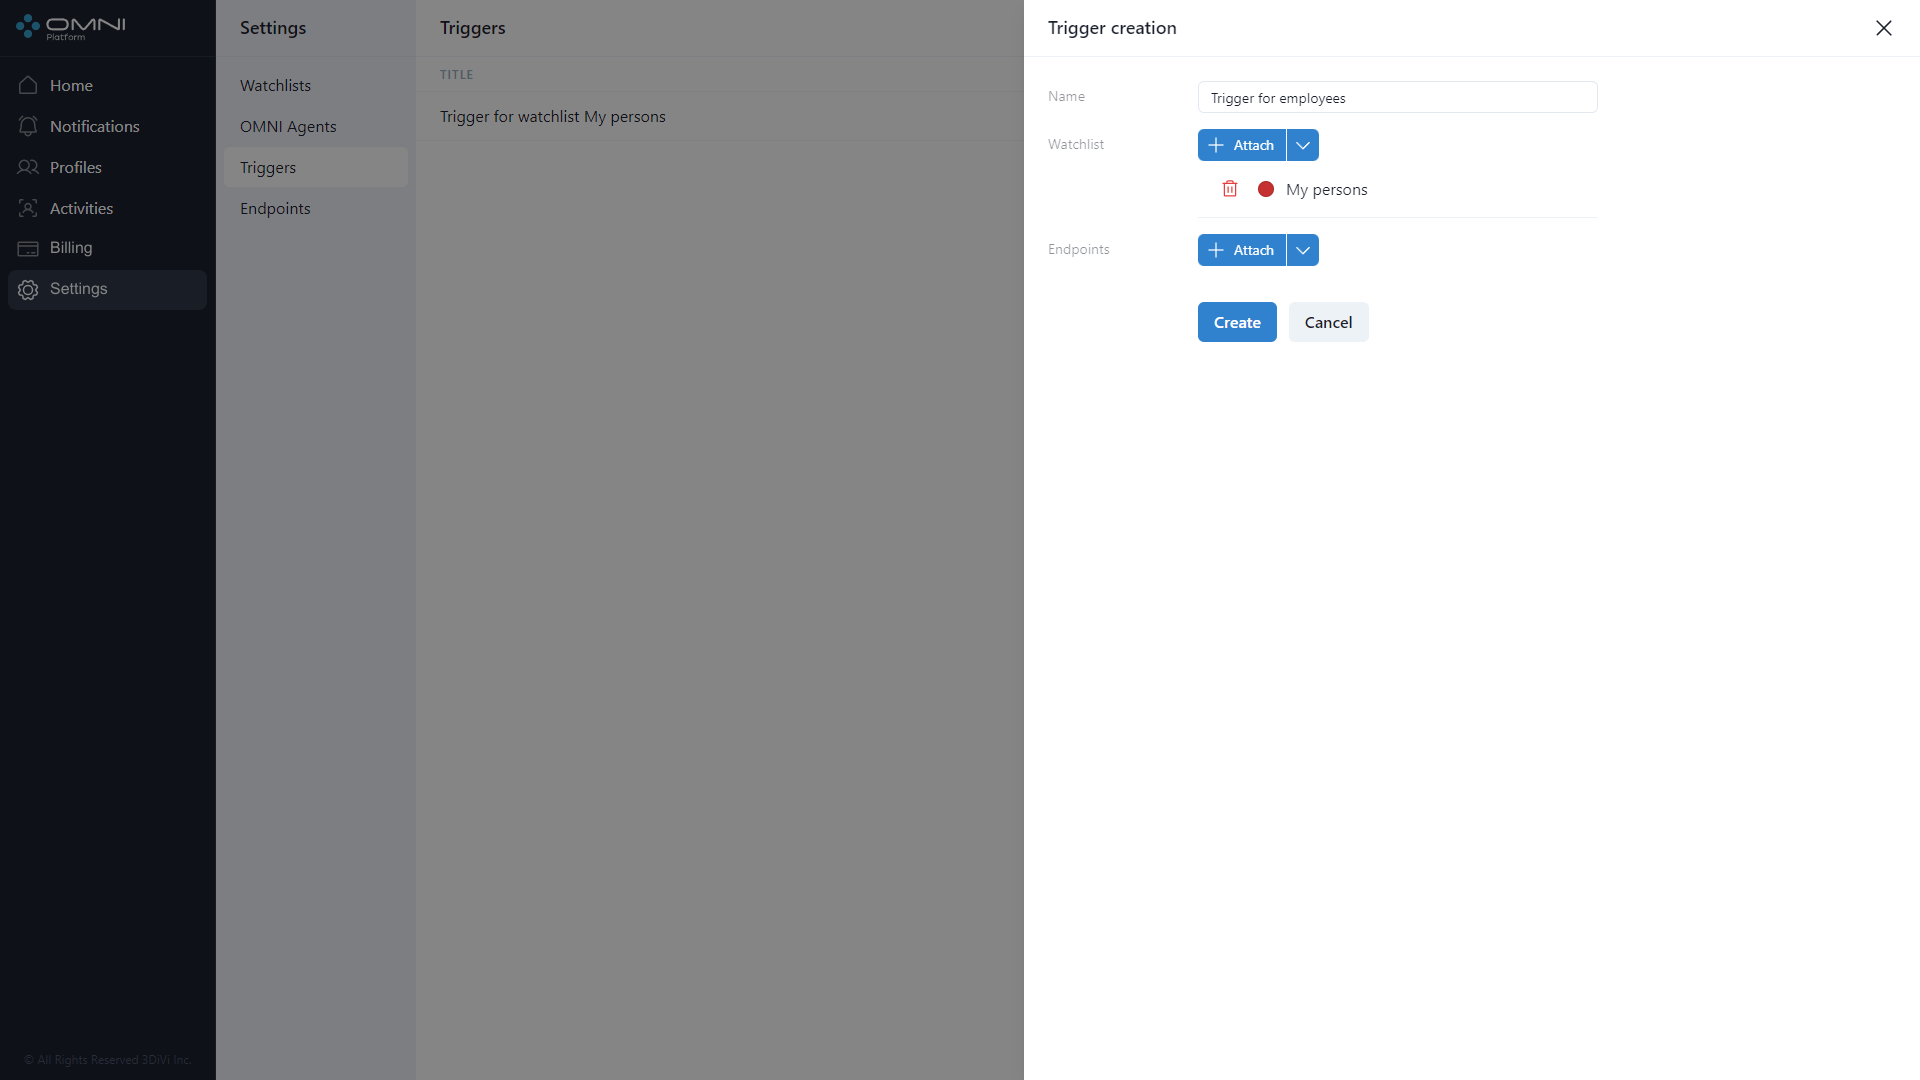
You can also create a watchlist by clicking Create a Watchlist option from the dropdown menu. You'll be redirected to Create a watchlist form. Once created, the watchlist will be attached to the trigger.

The endpoints are attached the same way. After all fields are filled in, click Create button.
- As a result, the system creates a trigger.

Note that a trigger without endpoints can create notifications, but they will be available for viewing only at Notifications page. In this case no pop-up, mail or webhook notifications will be supported.
View Triggers
To view the triggers, do the following:
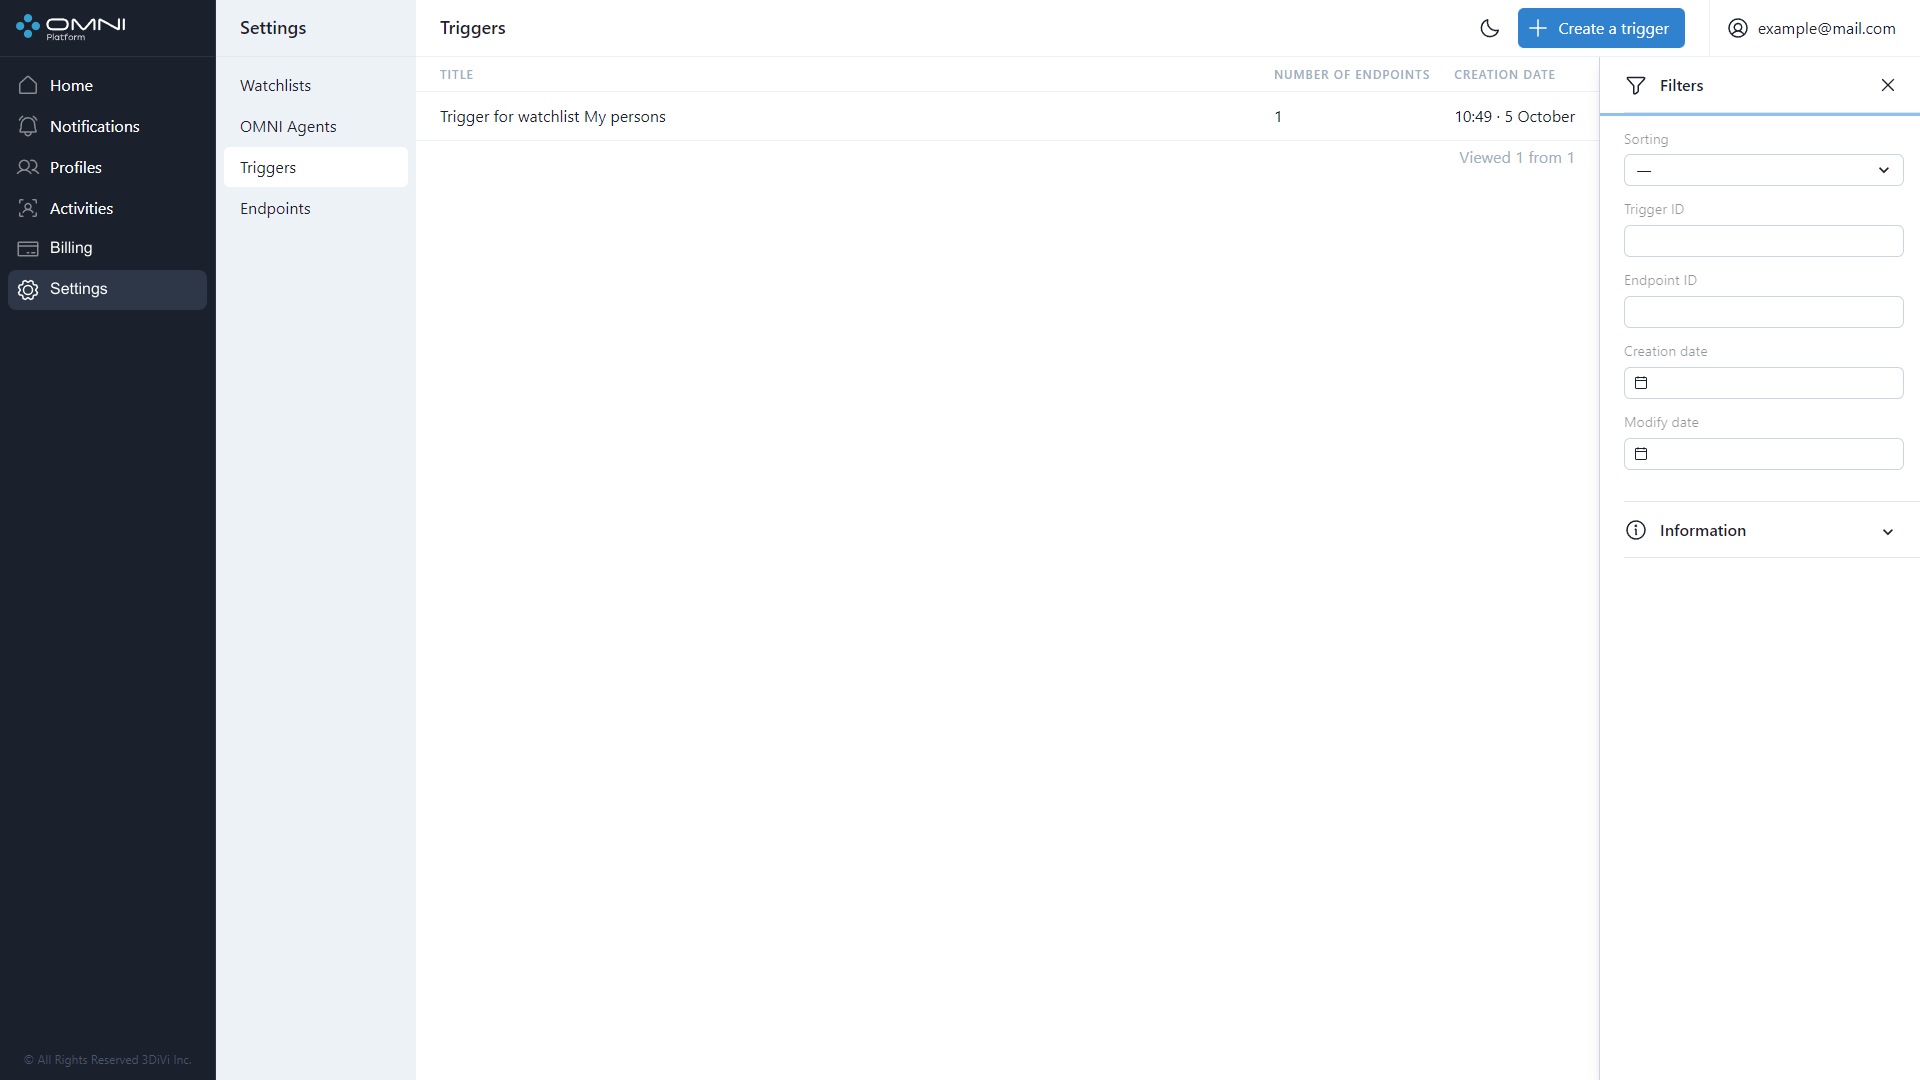
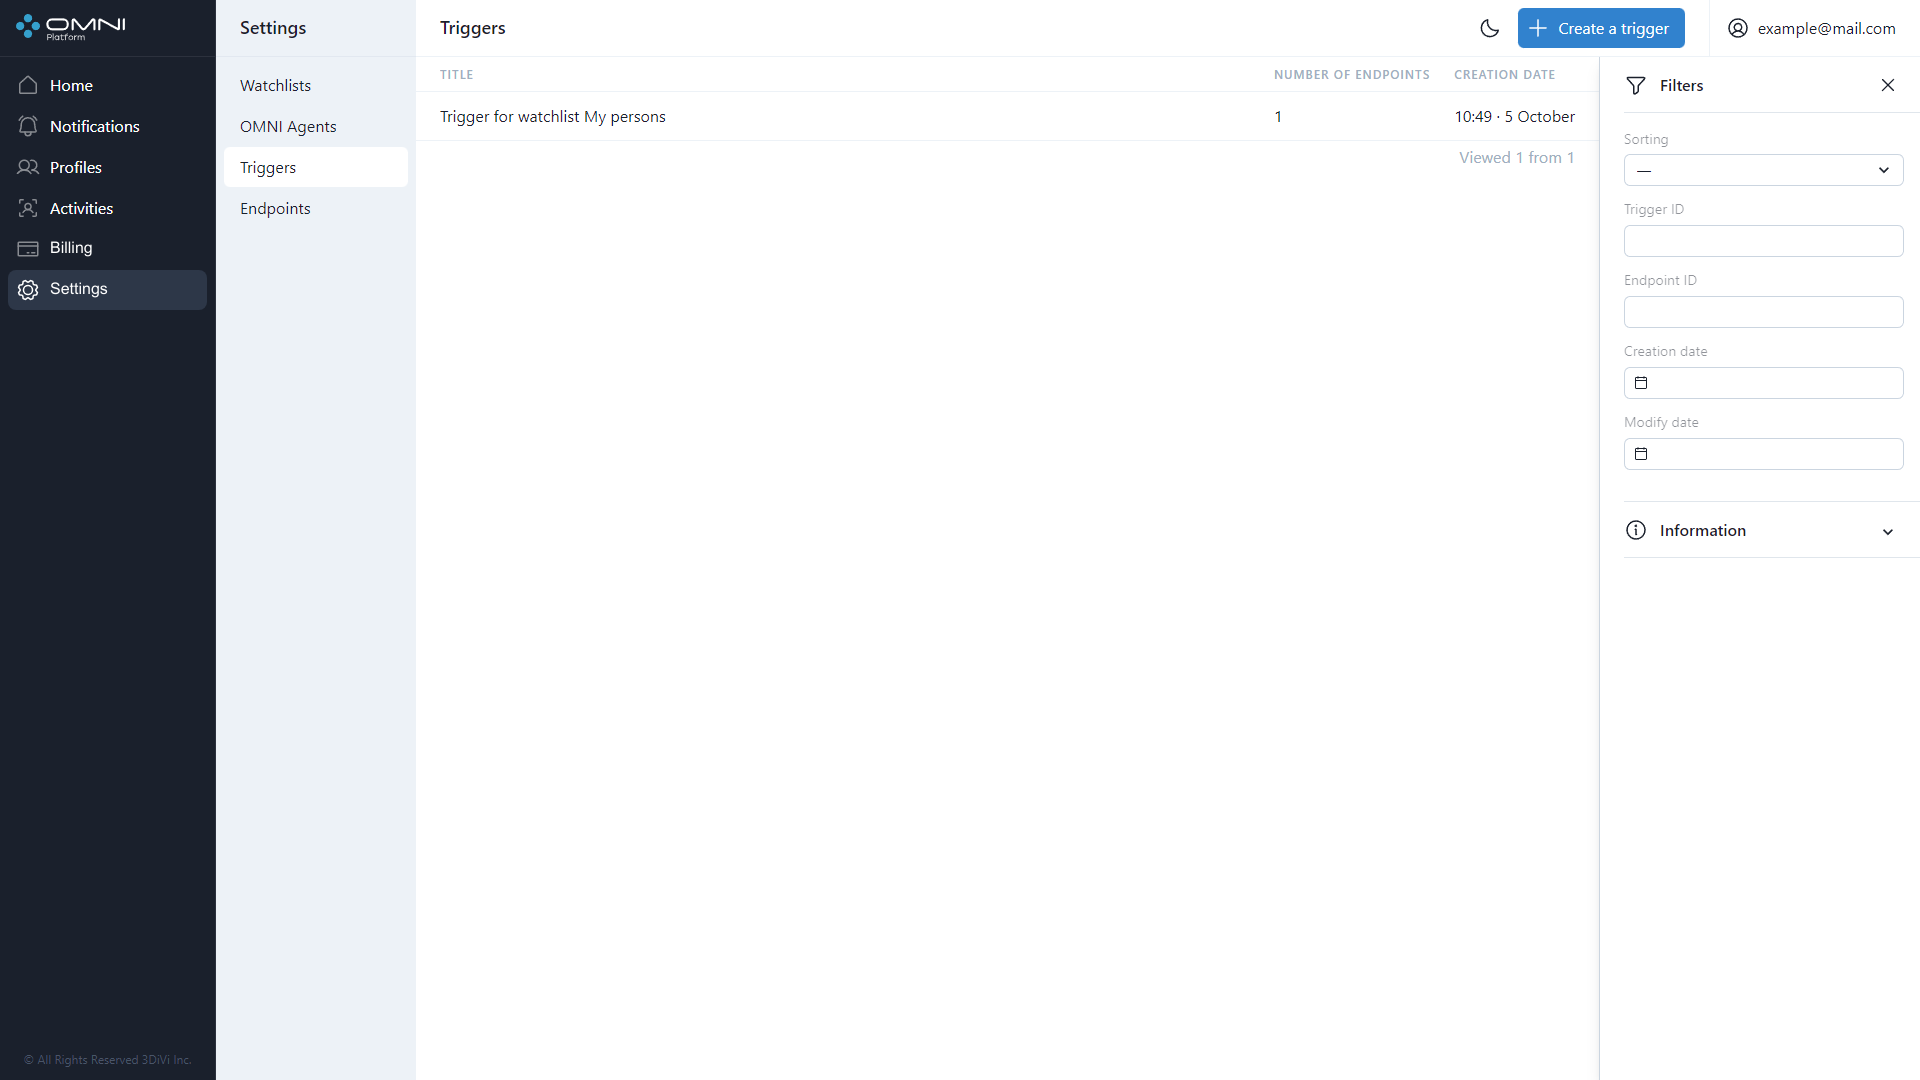
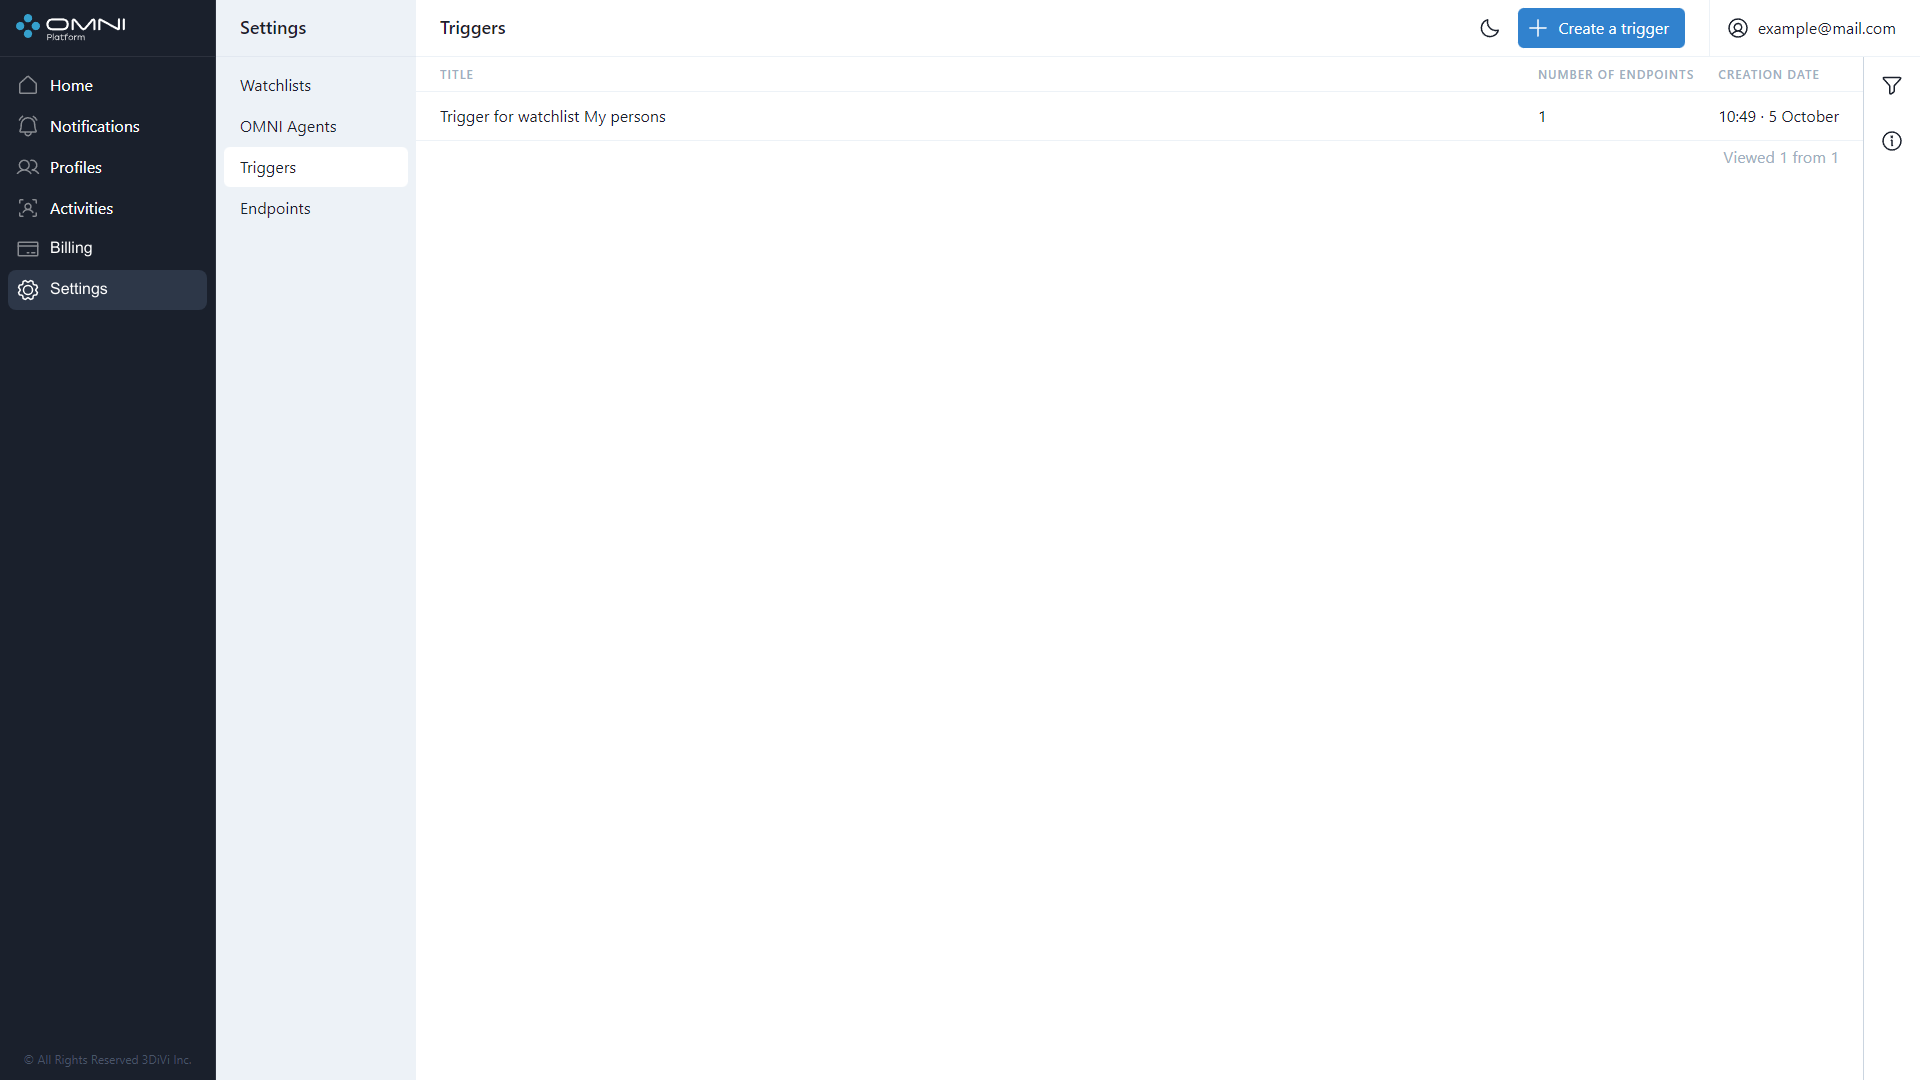
- Go to Settings page and select Triggers section. The page displays a table with the triggers currently existing in the database. On the first visit you'll see My persons trigger, created by default when the account is created.

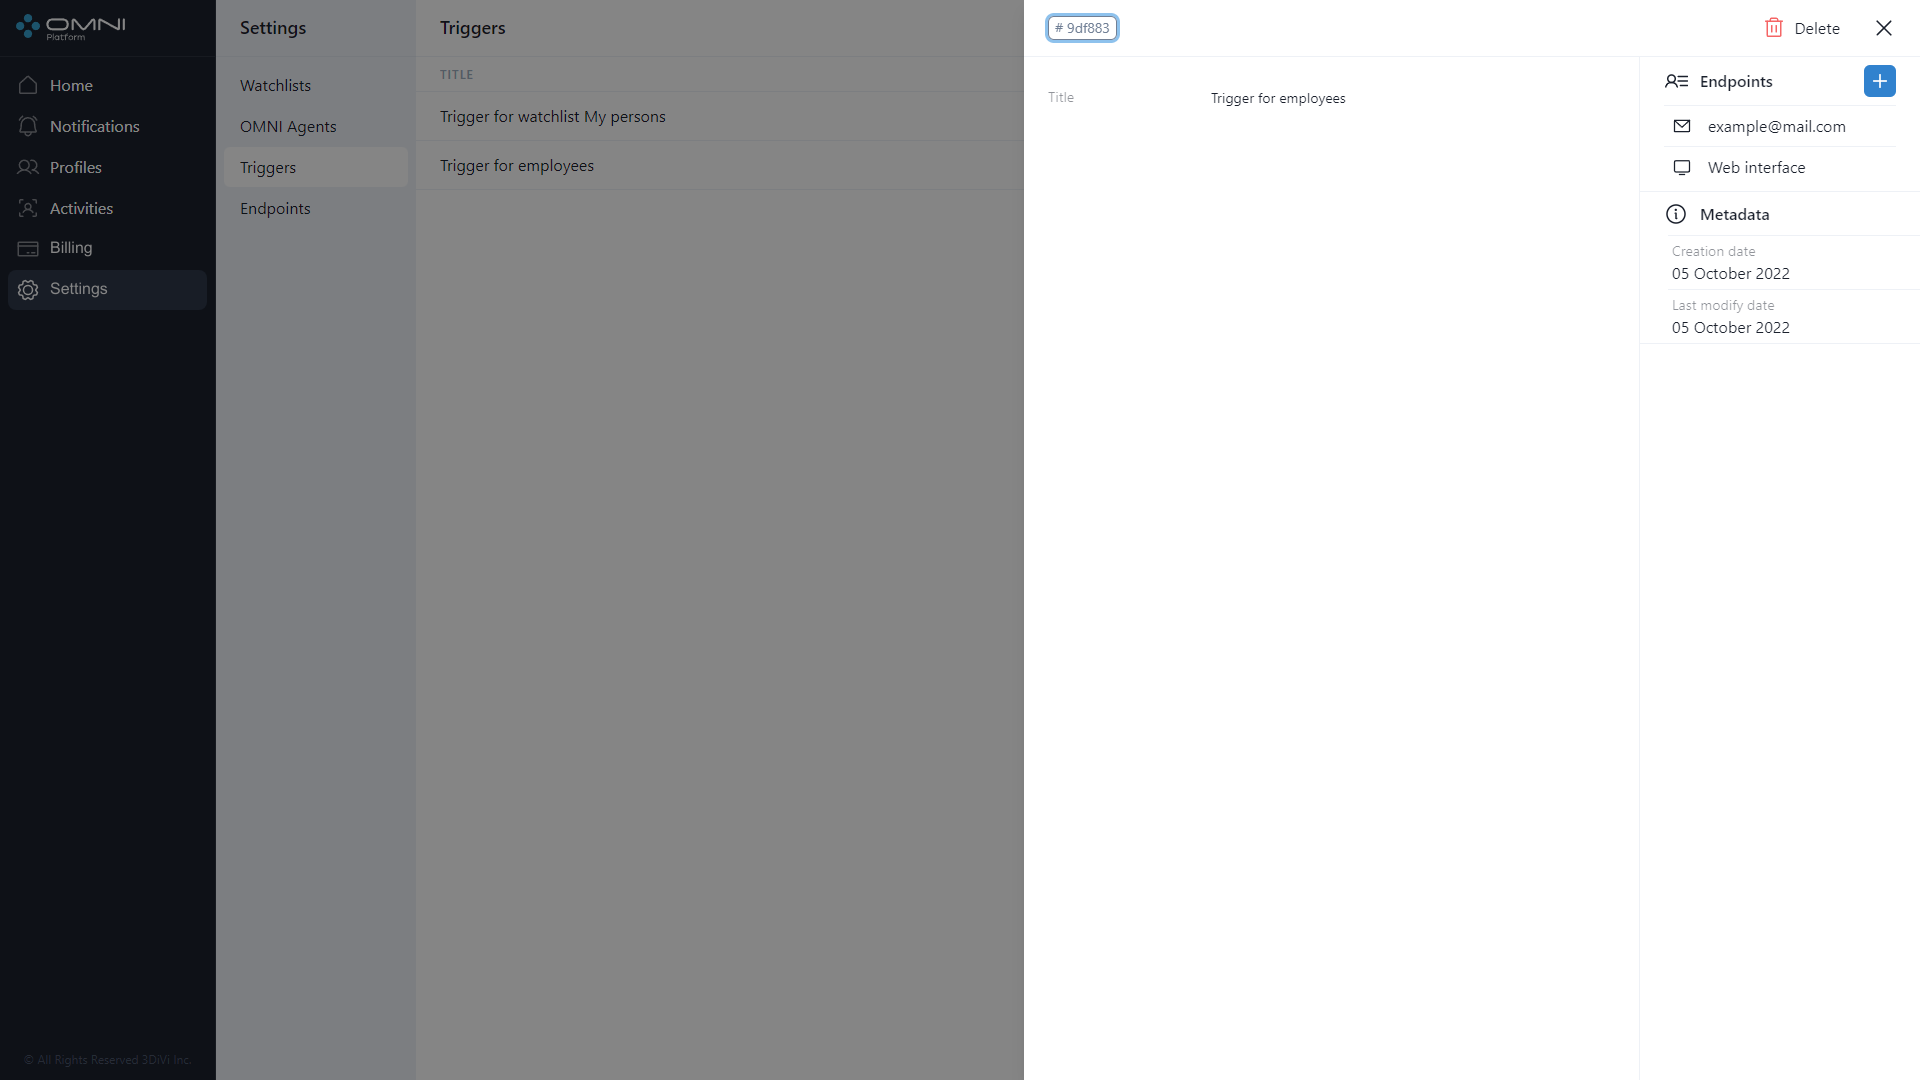
- To view detailed information, click on a row in the table to open the trigger card. The card displays attached endpoints, creation date, last modification date, and a button with a shortened ID. To see the full ID, just hover over this button. If you click the button, watchlist ID will be copied to the clipboard.
Edit Triggers
To edit triggers, do the following:
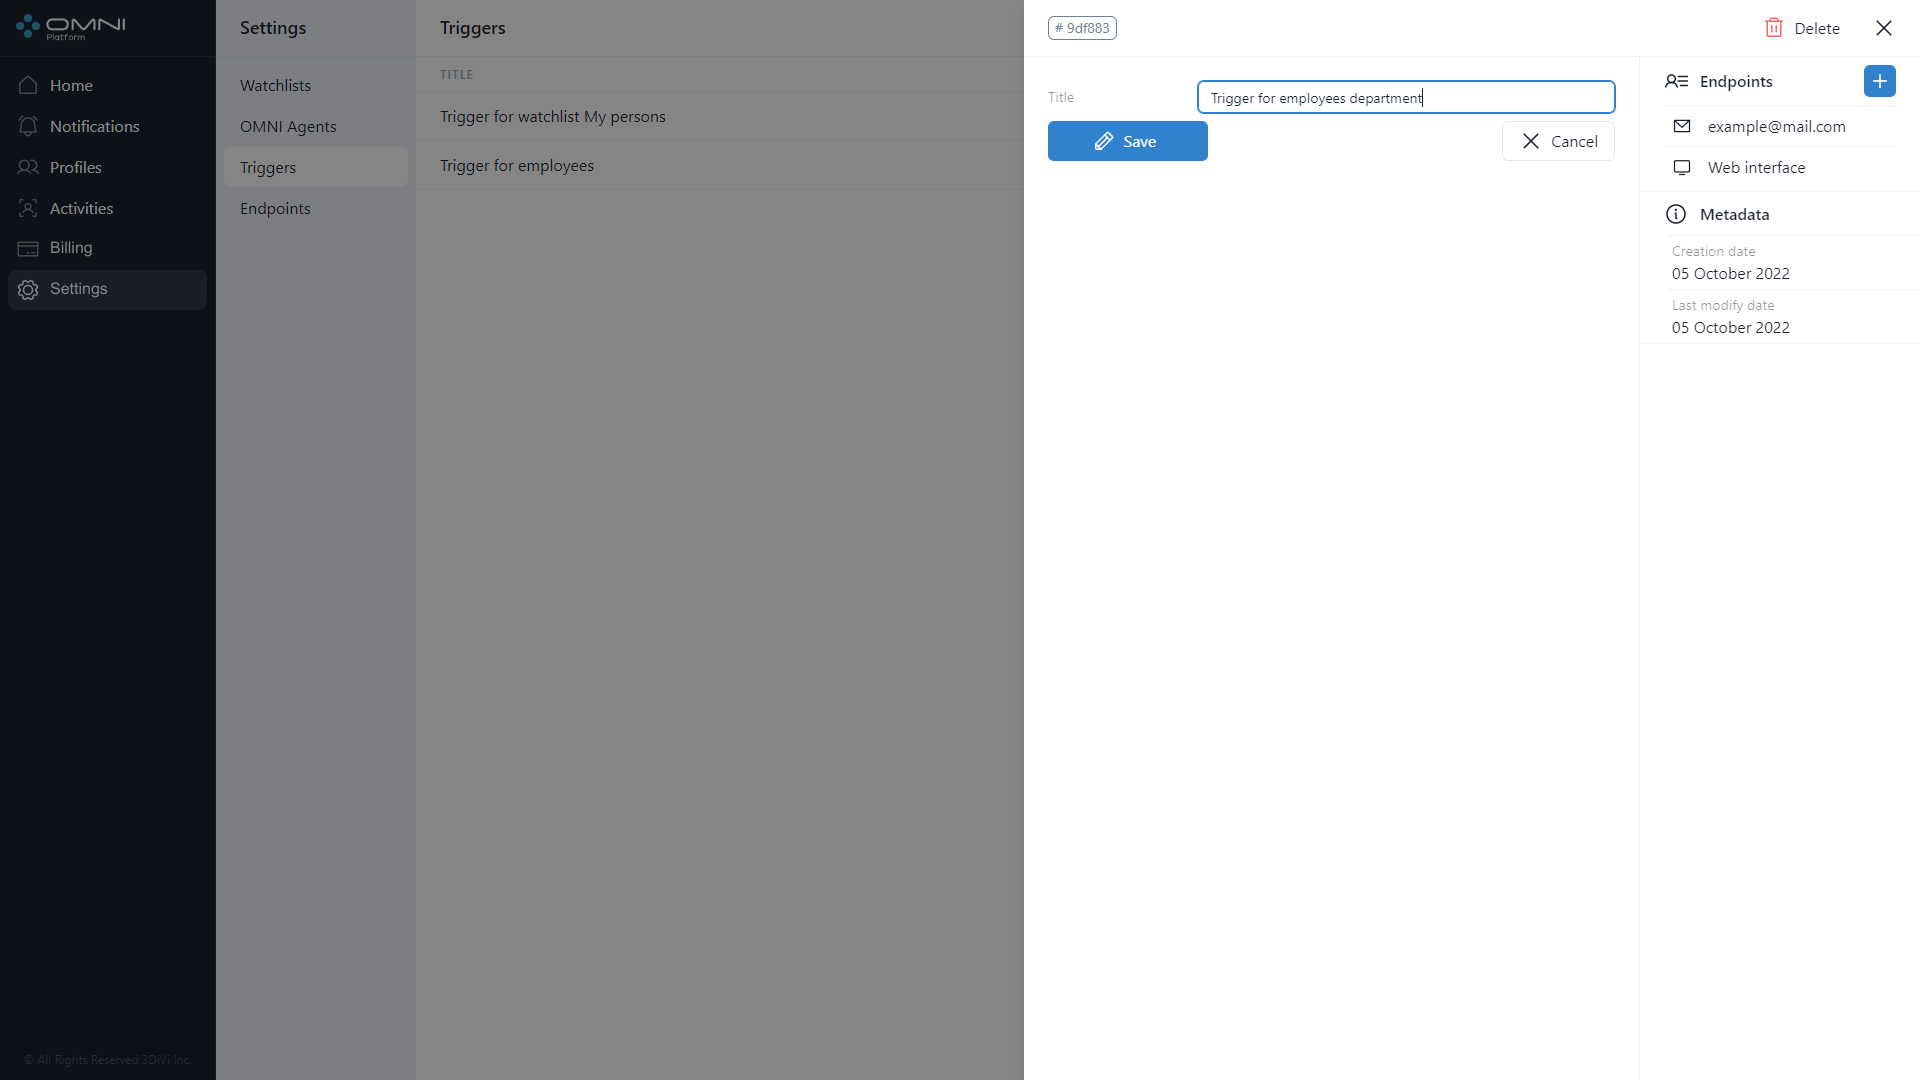
- Click on a table row in Triggers section to open the trigger card.

- In the card you can change trigger name and attach/remove endpoints. To change the name, just click on the appropriate field. To interact with endpoints, use Endpoints section. After editing click Save button. To attach/remove an endpoint, click + button. Before this make sure that you have at least 1 endpoint created. To learn how to create an endpoint, follow Endpoints section of this User Guide. After changes, click Save button.
- As a result, a trigger contains 2 endpoints.

Delete Triggers
To delete a trigger, do the following:
- Open a trigger card by clicking the appropriate row in Triggers table and click Delete button at the top right side of web interface.
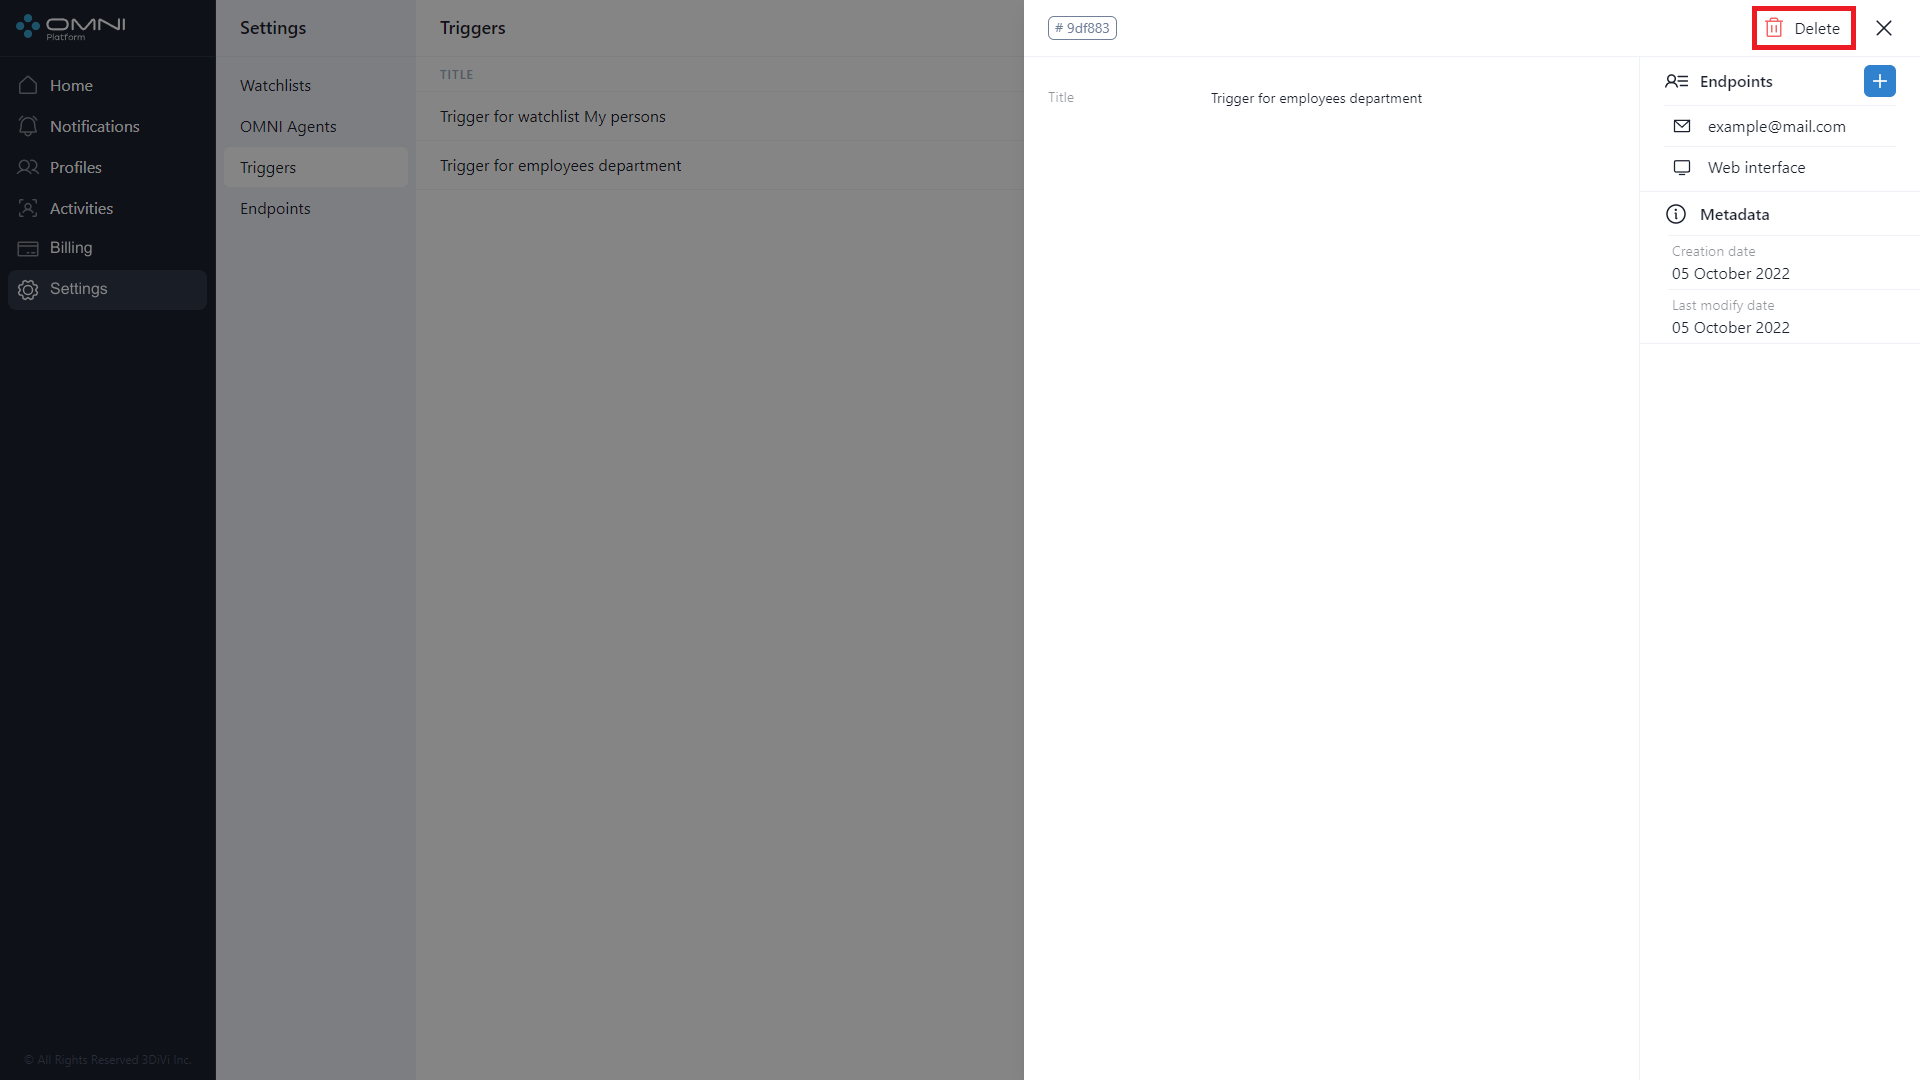
- Confirm the deleting.

- As a result, a trigger is deleted from the database.
Filtering
The system contains a list of filters and sorting options for trigger searching. Triggers are filtered by the following parameters:
- Endpoint ID
- Trigger ID
- Creation date
- Last modification date
Triggers are sorted by the following parameters:
- Creation date
- Last modification date
- Name
To configure filters, click Filtering icon at the top right side of web-interface under Account button.
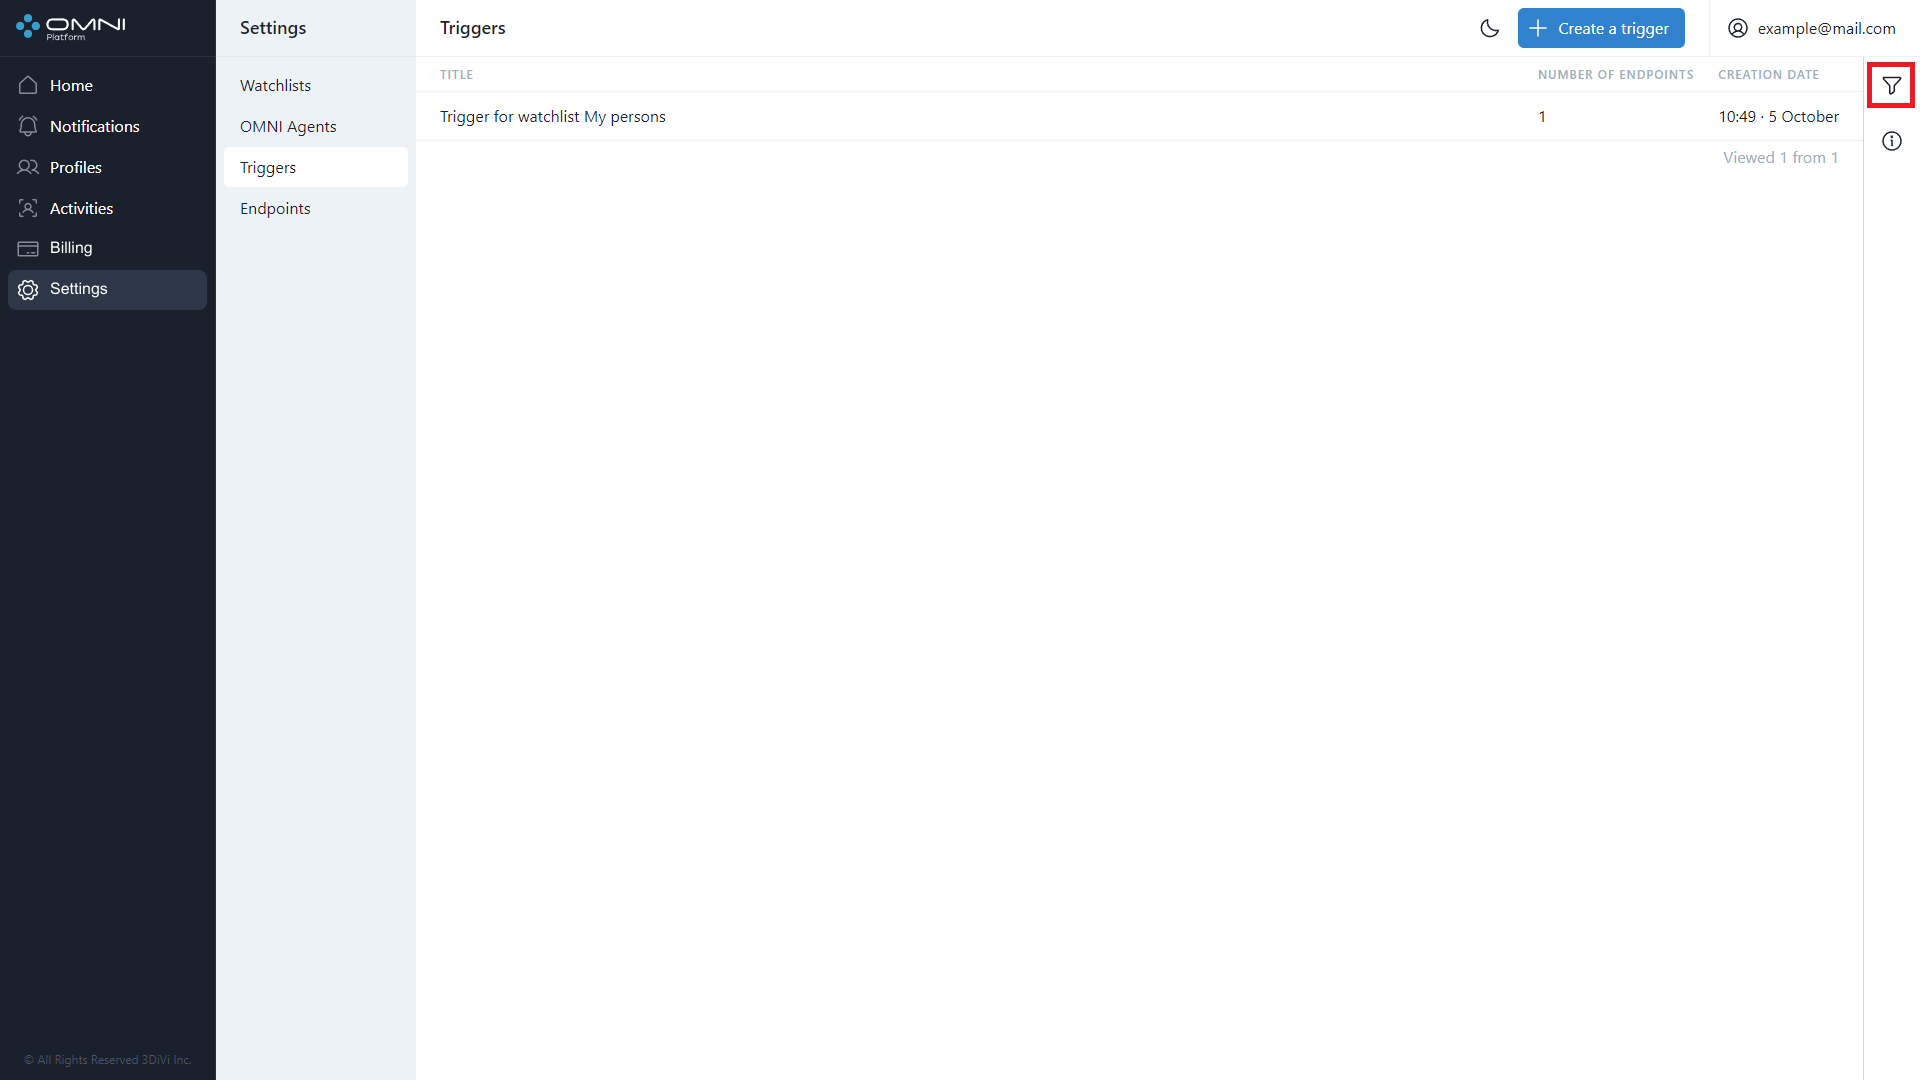
Fill in the appropriate fields in the opened tab. IDs can be copied from object cards.